Setting Up SSO in Xyte
Note: The screenshots in this guide show an Okta SAML setup as an example. You can choose a different identity provider or protocol to match your environment.
Overview
Single Sign-On (SSO) lets your users sign in to Xyte using your organization's identity provider — such as Okta, Google Workspace, or Microsoft Entra. Xyte uses Descope to guide the setup flow.
Your Xyte team starts the process by generating a secure setup link. You then open that link and complete the configuration on your side.
Before you begin
- Make sure you have admin access to your identity provider.
- Have your email domain(s) ready (e.g.
company.com). - Users must already exist in Xyte before they can sign in with SSO.
Who does what
| Xyte | Your team |
|---|---|
| Generates the secure setup link and sends it to you. | Opens the link and completes the SSO setup in the guided flow. |
| Provides the Xyte tenant where SSO will be enabled. | Configures the identity provider, adds the SSO domain, and runs the test. |
| Confirms SSO is ready on the Xyte side. | Clicks Test and Save to activate the configuration. |
Setup steps
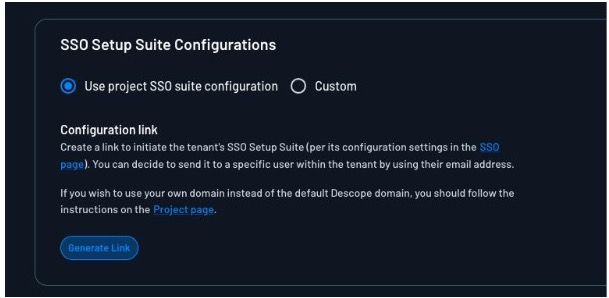
Step 1: Receive the setup link from Xyte
Your Xyte contact generates the setup link from the customer tenant and shares it with your IT or Identity team.
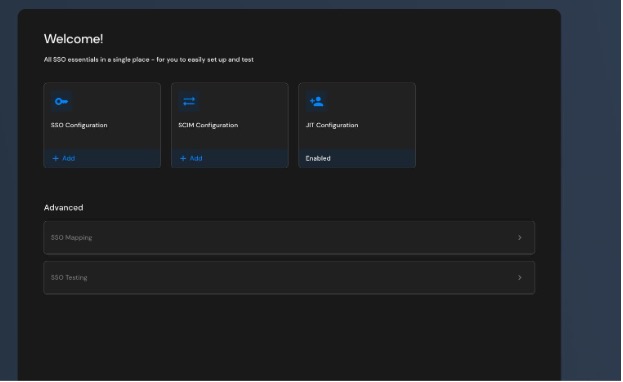
Step 2: Open the link
Open the link you received from Xyte. This takes you to the Descope setup flow where you will complete your part of the SSO configuration.
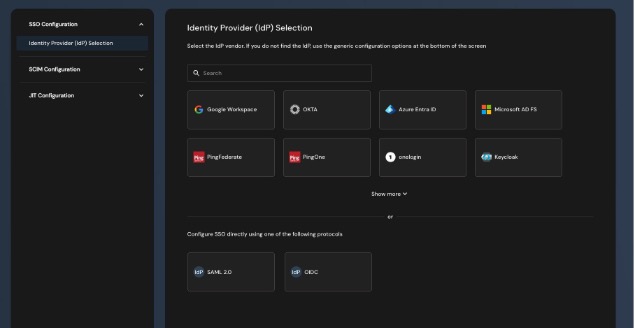
Step 3: Choose your identity provider
Select your identity provider from the available options. If needed, you can also use the generic SAML or OIDC options.
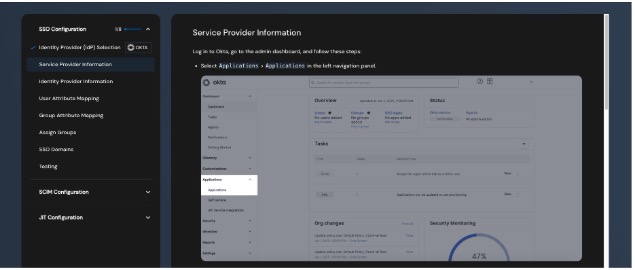
Step 4: Follow the guided setup steps
After choosing your provider, the setup flow will guide you through the remaining steps. You will be asked to enter information in your identity provider and copy some values back into the setup flow.
- Set up the SSO application in your identity provider.
- Enter or paste the required provider details.
- Map the required user attributes — Email is required.
- Add the email domain(s) that should use SSO.
- Run the test and confirm the setup works.
Domain routing: The domain controls who is redirected to SSO. For example, if
company.comis added, any user who signs in with a@company.comemail will be redirected to your identity provider.
Step 5: Finish the setup
When the test succeeds, click Test and Save. SSO becomes active immediately for the configured domain(s).
After that, users on those domains will be automatically redirected to your identity provider when signing in to Xyte.
Updated 3 months ago