Jira
Overview
The Jira integration connects Xyte's incident management with Jira Service Management (JSM), keeping both systems in sync automatically.
What it does:
- Incident opened in Xyte → a new Jira Service Management request is created automatically, with full incident, device, and location details
- Incident resolved in Xyte → the Jira request is transitioned to the configured close status
- Incident updated in Xyte → the Jira request's summary and priority are kept in sync with Xyte
- Jira request updated → changes to the title, description, or priority in Jira are reflected back in Xyte (requires webhook setup)
Authorization requires a site with both Jira and Jira Service Management. Xyte requests the
write:jira-workscope at authorization time so it can push incident updates back to Jira. Your Atlassian account must have access to a site that has both Jira and Jira Service Management enabled. If your account only has JSM, Atlassian will respond withAccess deniedon the consent screen; in that case, ask a workspace admin to enable a Jira product on the site or grant your user access to one.
Setup
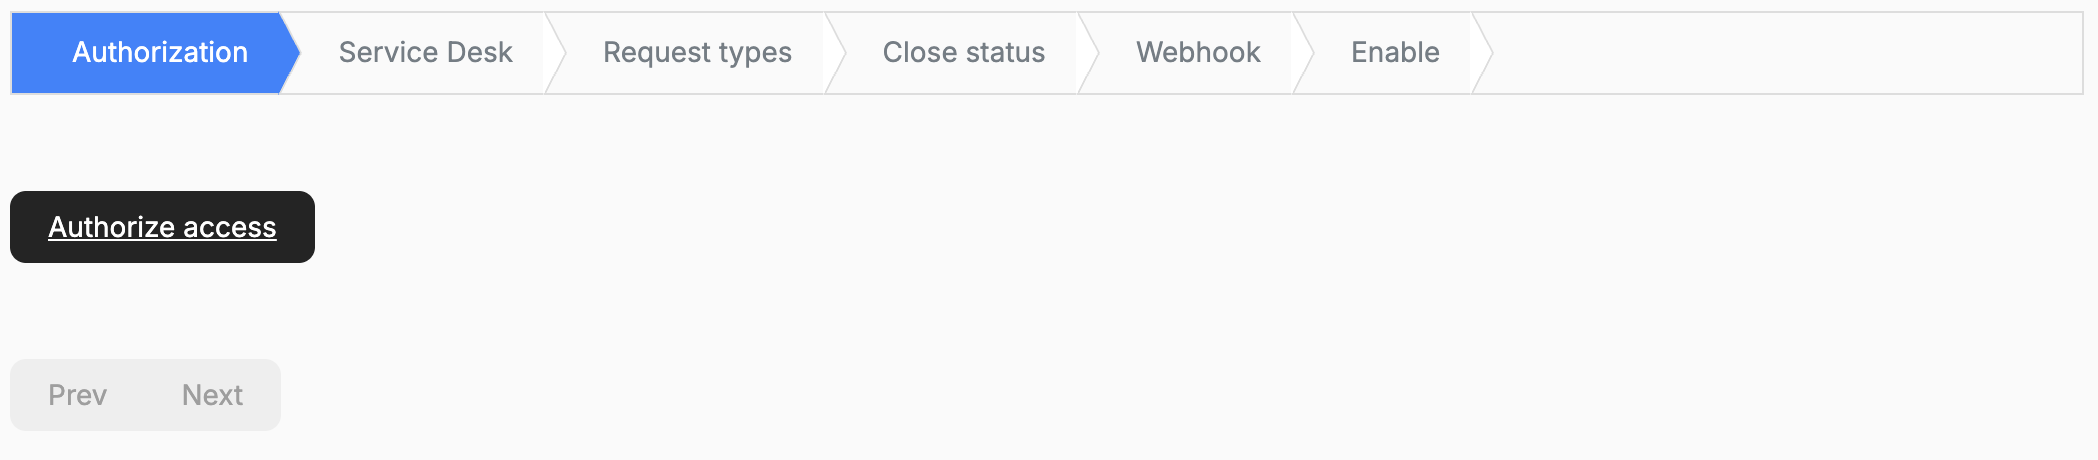
Authorizing Access
-
Click the Authorize access button.
-
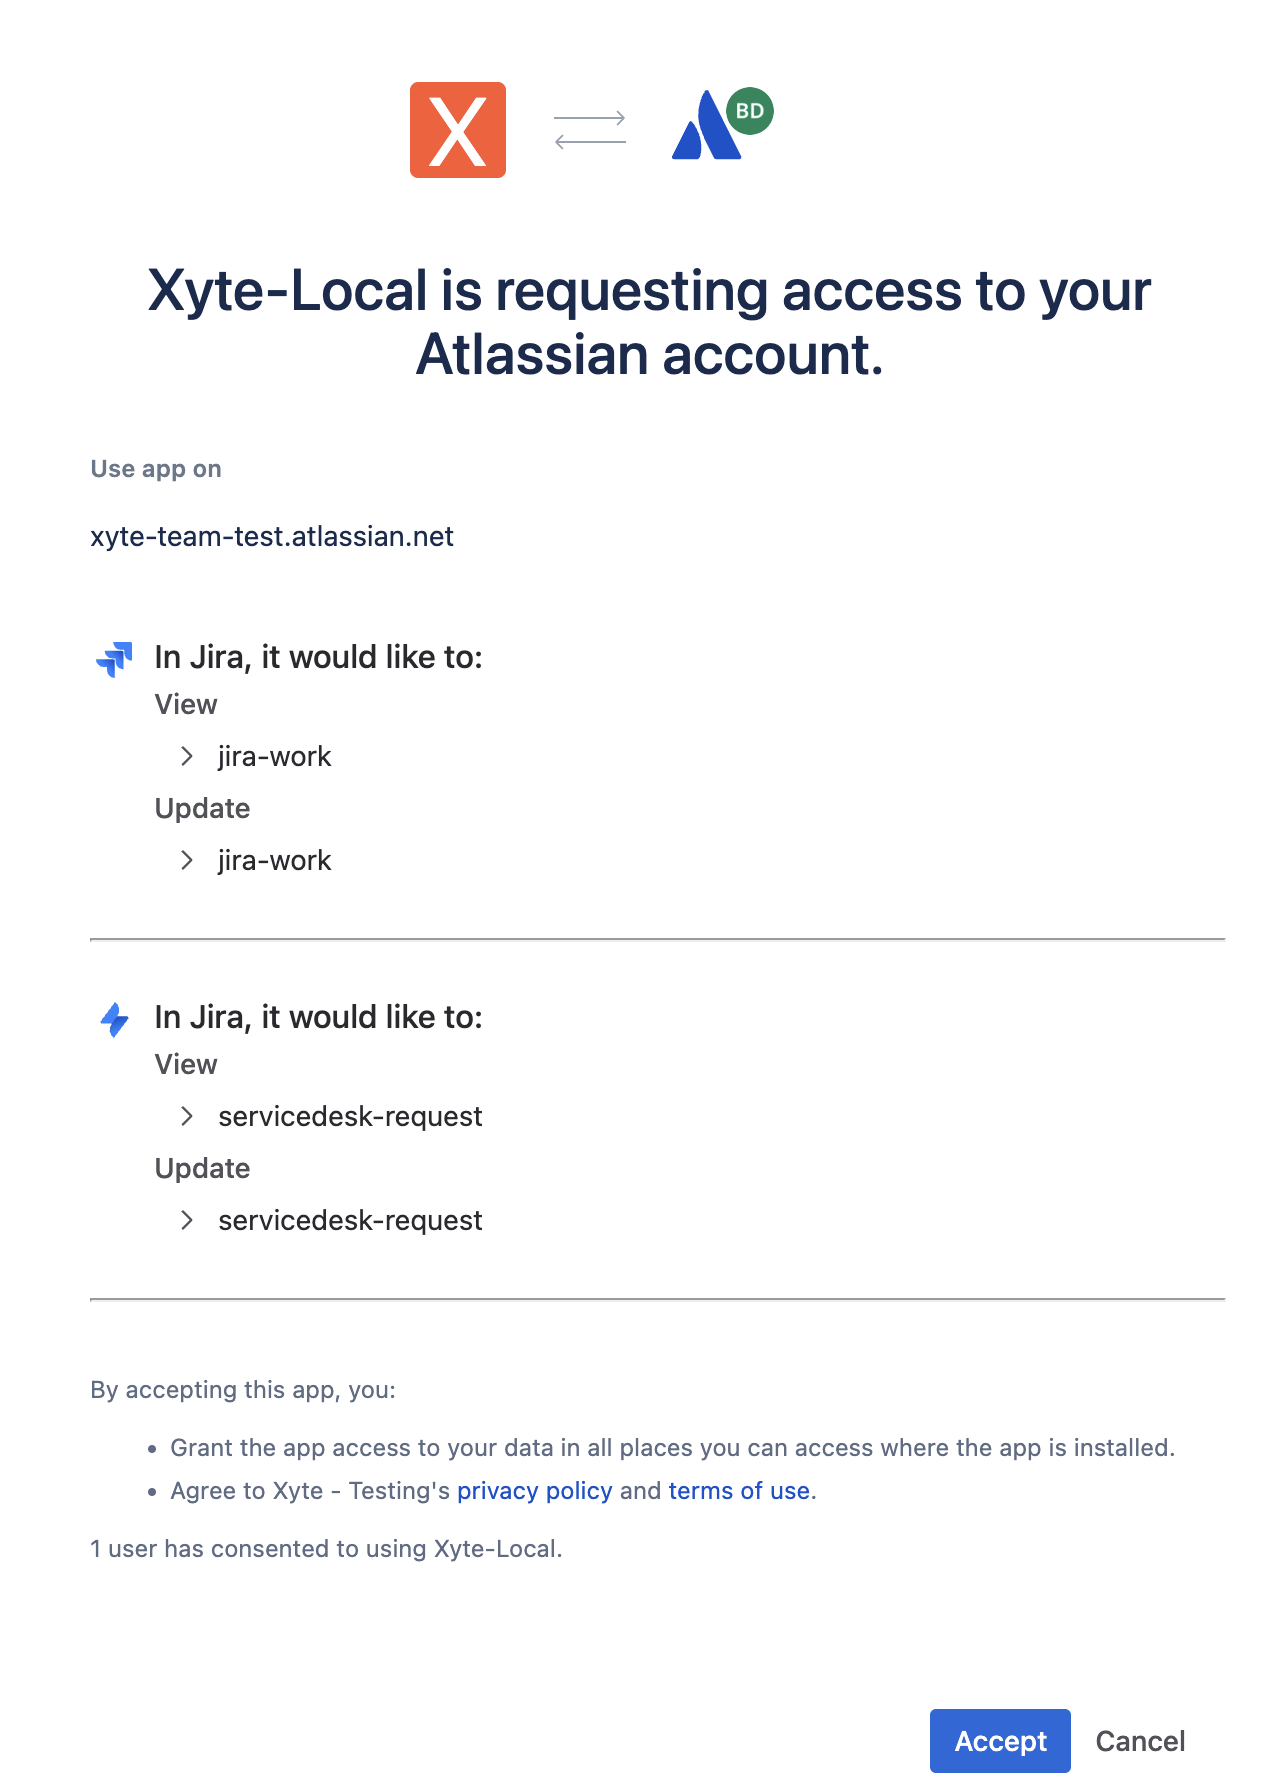
You will be redirected to Atlassian's authorization page — log in with a user that has administrative privileges on your Jira instance.
-
Review and approve the requested permissions. Xyte requests the scopes needed to create and manage Service Desk requests and to push incident updates (summary, priority) back to Jira.
-
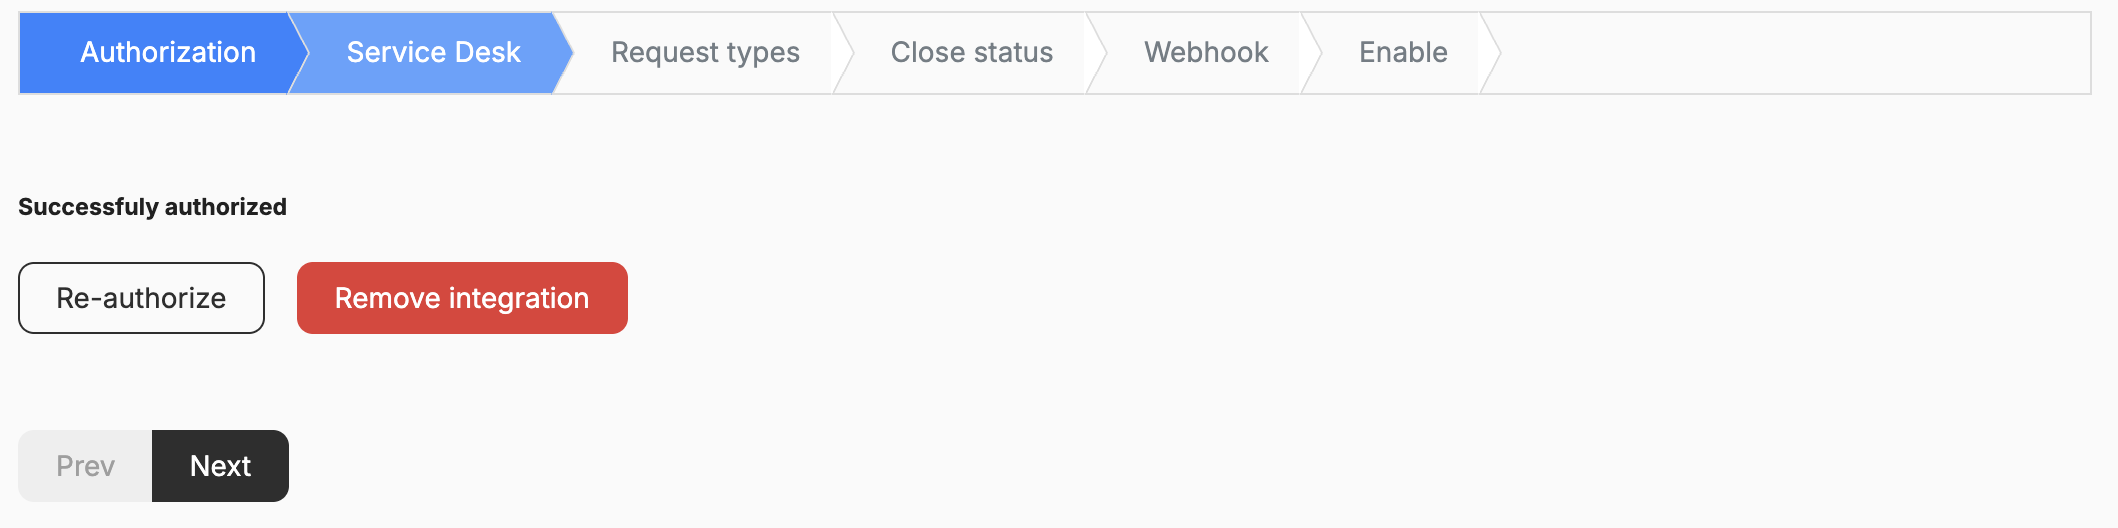
You will be redirected back to Xyte to complete the setup.
-
Click Next.
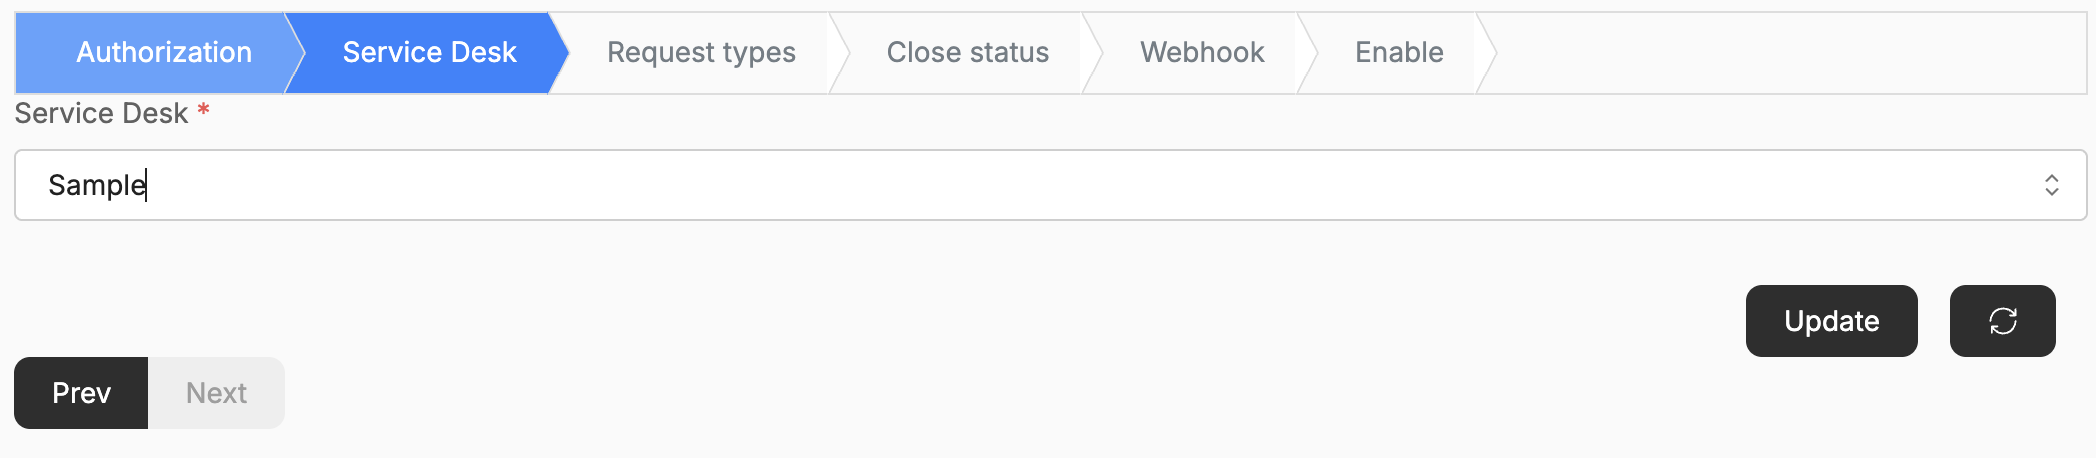
Select Service Desk
-
Select the Service Desk from the list fetched from your Jira account.
-
Click Update, then Next.
If your required Service Desk is not listed, verify that there are no limiting permissions on the Jira side, then click the purple Reload button to have Xyte re-fetch all available options.
Request Types
-
Select the Request Type to use when new incidents are detected.
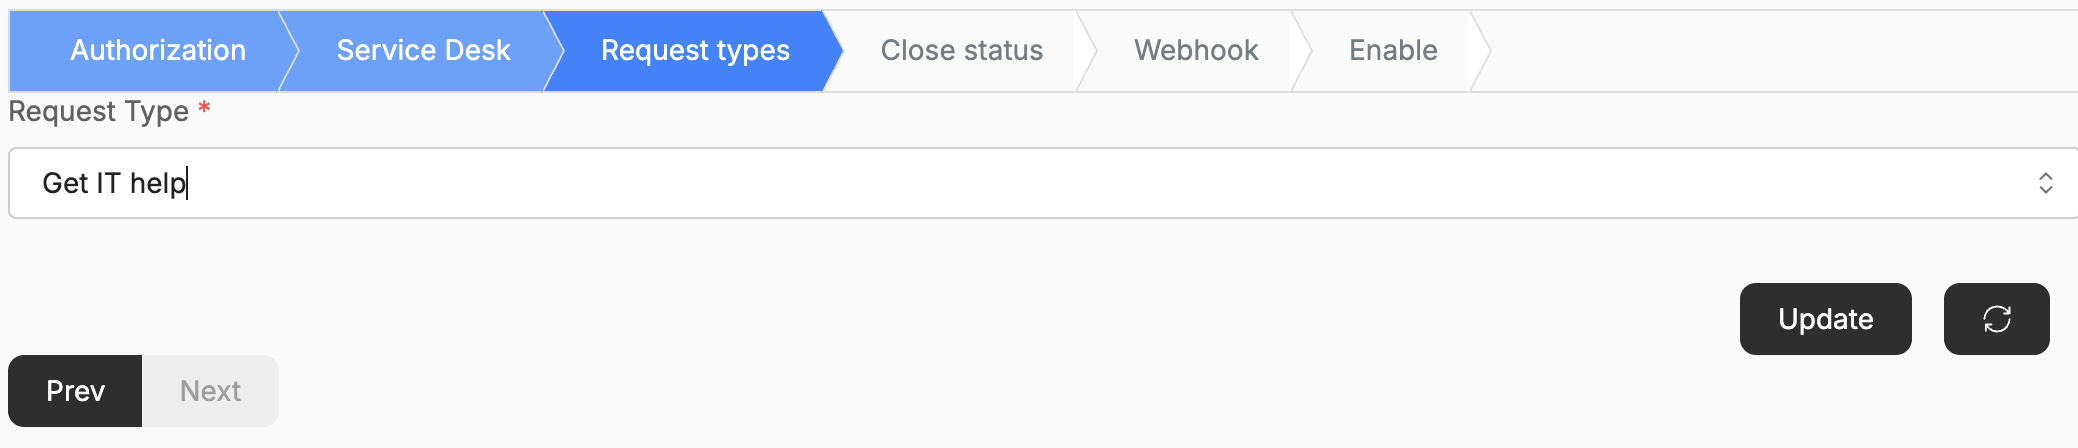
-
Click Update, then Next.
If your required Request Type is not listed, verify that there are no limiting permissions on the Jira side, then click the purple Reload button to re-fetch all available options.
Close Status
- Select the status transition to apply to a Jira request when the incident is resolved in Xyte.
- Click Update, then Next.
If your required Close Status is not listed, verify permissions on the Jira side and click the purple Reload button.
Make sure at least one status transition in your Jira workflow can move a request from any open state to closed, otherwise Xyte will not be able to close the ticket.
To disable automatic closing (and manage ticket status entirely from Jira), select the Do not auto-close option.
Webhook
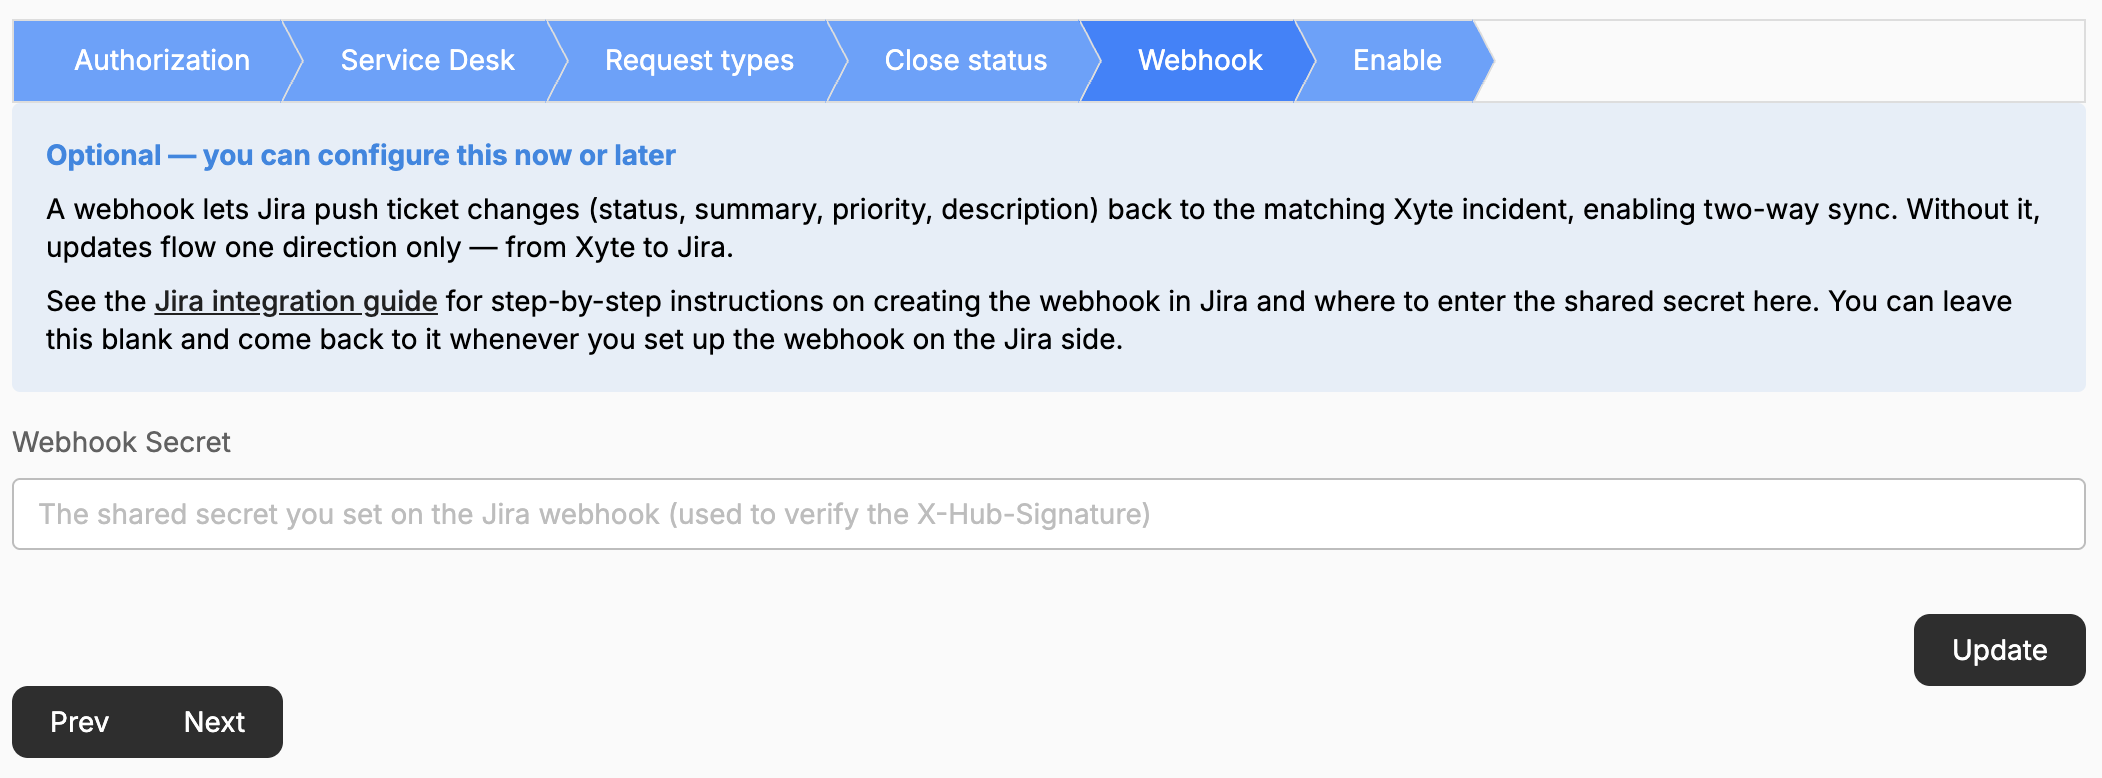
See details below on Webhook setup.
Enable
-
Click the Activate button to enable the integration.
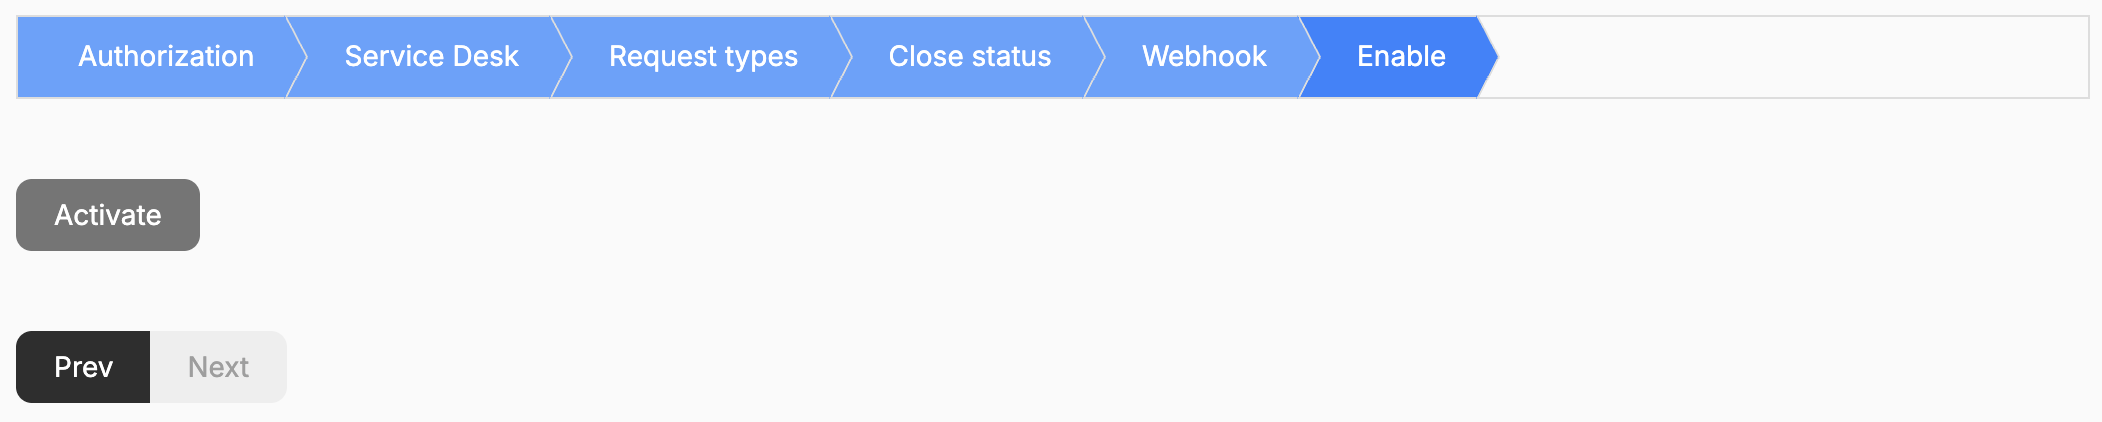
Once active, every new Xyte incident will automatically open a Jira Service Management request.
Webhook Setup (Sync from Jira to Xyte)
By default, sync goes one way: Xyte → Jira. To enable updates from Jira back to Xyte (title, description, priority changes, and closing the Xyte incident when the Jira request is resolved), register a webhook in Jira and share a secret with Xyte.
The setup is a one-time flow:
- Create the webhook in Jira
- Copy the auto-generated secret & paste the secret into Xyte's Webhook step
You need site-admin permissions in Jira to access the WebHooks page below. If you don't have access, ask your Jira admin to do Steps 1–3 and hand off the secret.
What syncs back to Xyte
| Jira change | Effect in Xyte |
|---|---|
| Summary (title) updated | Incident title updated |
| Description updated | Incident description updated |
| Priority changed | Incident priority updated (Highest→Critical, High→High, Medium→Moderate, Low→Low, Lowest→Planning) |
| Status moved to a Done category | Xyte incident is closed |
Xyte will not reopen a closed incident, even if the Jira request is reopened.
Step 1 — Create the webhook in Jira
- In Jira, navigate to Settings (cog icon) → System → WebHooks (under the Advanced section).
- Direct URL:
https://<your-jira-instance>.atlassian.net/plugins/servlet/webhooks
- Direct URL:
- Click + Create a WebHook.
- Fill in the form:
| Field | Value |
|---|---|
| Name | Xyte Callback (or any descriptive name) |
| Status | Enabled |
| URL | https://hub.xyte.io/external/jira/webhook |
| Issues – JQL | Leave blank to receive events for all issues, or use a JQL filter to scope the webhook to a single project (e.g. project = SUP). On busy instances this is recommended — limit the webhook to the project(s) Xyte opens issues in. |
| Issue related events | Check updated |
Do not save the form yet. Continue to Step 2 to generate the secret first.
Step 2 — Generate the shared secret
Still on the WebHooks create form:
- In the Secret section, click Generate secret. Jira will populate the field with a fresh random string.
- Copy the secret value now — Jira hides it permanently after you save and you'll need to regenerate (which invalidates any existing pairing) if you lose it.
- Click Save to create the webhook. Jira will now sign every delivery with HMAC-SHA256 over the raw request body using this secret, and include the signature in the
X-Hub-Signatureheader.
If you'd rather supply your own value, paste any strong random string (e.g.
openssl rand -hex 32) into the Secret field instead of clicking Generate. Treat it like a password.
Step 3 — Paste the secret into Xyte
- In Xyte, open the Jira Integration settings and click the Webhook step in the setup wizard (between Close status and Enable).
- Paste the secret from Step 2 into Webhook Secret and click Update.
The Webhook step is optional and can be completed at any time, even after the integration is already active. If you skip it, Xyte → Jira continues to work; only the Jira → Xyte direction is disabled.
Without a matching secret in Xyte, inbound webhook deliveries from Jira are rejected with
403 Forbidden. The integration's outbound sync (Xyte → Jira) is unaffected.
Step 4 — Verify it's working
- Open any Jira request that is linked to a Xyte incident.
- Change the summary, priority, or description, or transition the request to a status in the Done category.
- Open the matching incident in Xyte and confirm the change is reflected (typically within a few seconds).
If nothing happens, see Troubleshooting below.
How Xyte authenticates the request
For every inbound delivery Xyte recomputes HMAC-SHA256(body, webhook_secret) and compares it (constant-time) to the value Jira sent in the X-Hub-Signature header (in the form sha256=<hex>). The first active Jira integration whose stored secret produces a matching signature wins; if none match, the request is rejected with 403 Forbidden.
Once authenticated, Xyte matches the Jira issue ID to an existing incident in that integration's organization. If no incident is found, the event is silently ignored — Xyte does not create incidents from Jira-originated events.
Troubleshooting
| Symptom | Likely cause |
|---|---|
Jira deliveries to Xyte show 403 Forbidden in the Jira webhook Audit log | The secret in Xyte's Webhook step doesn't match the one Jira is signing with. Re-do Steps 2–3, making sure to copy the secret verbatim. |
| Jira deliveries time out or get connection errors | The webhook URL is unreachable from the internet. Confirm https://hub.xyte.io/external/jira/webhook is reachable from your Jira instance (Jira Cloud cannot reach private/localhost addresses). |
| Webhook fires but the Xyte incident doesn't change | The Jira issue ID isn't linked to a Xyte incident. Xyte ignores events for issues it didn't create. |
| Status transitions don't close the Xyte incident | The destination Jira status must be in the Done status category (not just named "Done"). Check the workflow in Jira's project settings. |
| Lost the secret value | Open the webhook in Jira, click Change secret, generate a new one, and re-paste it into Xyte. The previous secret is invalidated. |
Updating
You can update the integration settings (service desk, request type, close status) or disable the integration at any time from the Jira Integration settings in Xyte.
Changing the close status or request type takes effect immediately for new incidents. Existing open incidents continue using the settings that were active when they were created.
Updated 2 months ago