Claiming a Cloud 2 Cloud device
Overview
Device with existing cloud solutions, can be easily managed en-mass via Xyte's existing Cloud 2 Cloud integrations. The integration is done via different Connectors.
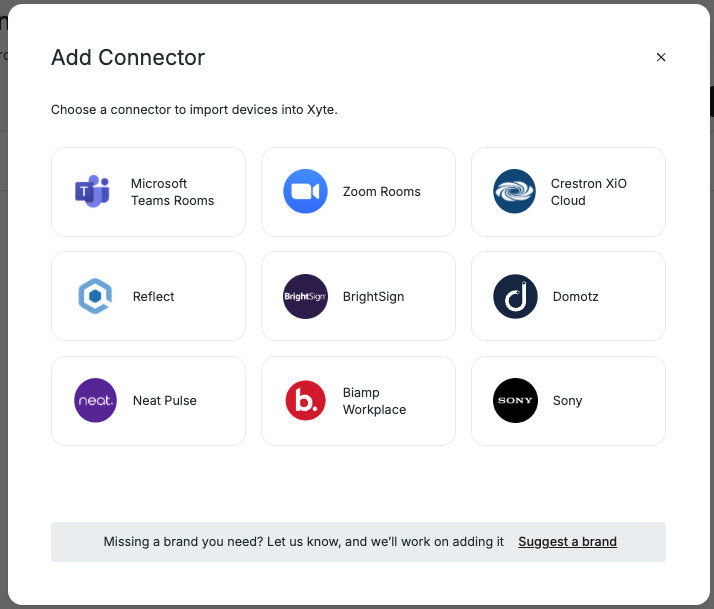
Creating a Connector
- Visit the "Connectors" management area by clicking "Connectors" on the left side menu.
- Click "Add connector" to start the setup process.
- Select the connector you would like to use, based on the existing cloud solutions you already manage.
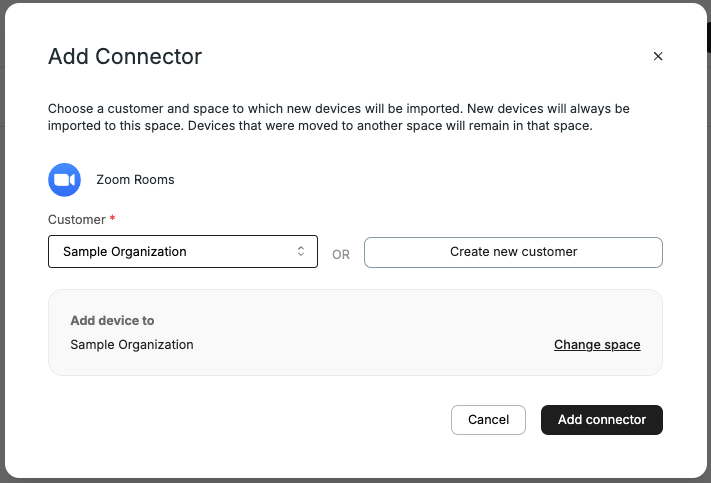
- Select the Customer and Space to which the connector will be bound to. Since each Customer might have their own Zoom (etc) accounts, each Connector is forever tied to a single Customer. And devices managed via the Connector are only available inside that Customer.
Setting the Space will affect how some connectors import data from other clouds. For example, the Zoom Connector will automatically pull the existing tree structure from Zoom and set it up under the selected Customer and Space.
- Click the "Authorize" button to connect the clouds.
- Copy the generated "Authentication Link" and open it in a new tab. Make note of the Passcode as it will be required there.
Since some Connectors require the Customer's IT team to approve the integration, the Authentication Link can be shared with them to allow authorization with clouds, you might not have direct and full admin access to.
The authentication page is separate from the main Xyte tenant to allow this link to be shared with the IT teams that are in charge of the connected cloud. Since in many cases these teams are not part of the device management team.
Sharing the link allows the target team to securely authenticate the connector, without having to share secrets with the SI.
Each connector has different requirements for authorization and different capabilities, the details should be clearly explained during each step. For any issue, contact support for more information.
After setup
Connectors might take up to 30 minutes to sync very large tenants. The process is automated and you will start seeing the synced devices (and spaces if available) within a few minutes.
Updated 9 months ago