
Slack
Set up Slack as an integration recipient for incident notifications.
Send Xyte incident notifications straight to a Slack channel. Setup is a short wizard — Connect → Channel → Messages → Filtering → Enable — where Messages (tailoring the notification text and incident threading) and Filtering (a minimum incident priority) are optional, followed by optional per-space routing.
Each stage saves itselfEvery stage has its own button — Update on Channel, Save templates on Messages, Save filtering on Filtering, Activate on Enable. The Prev / Next buttons at the bottom of the wizard only move between stages; they do not save anything. If you leave a stage without clicking its own button, your selection is not stored.
Requirements
- Company Slack Administrator access (needed to authorize the Xyte app).
- If your workspace restricts app installations, a Slack admin has to approve the Xyte app for the workspace. Xyte is not listed in the Slack Marketplace, so Slack may warn that the app is not approved and hold the install until an admin allows it.
- Your workspace's Slack URL (for example,
company-workspace.slack.com). - A public Slack channel to receive notifications (for example,
tech_support).
Open the Slack integration
Go to Settings → Integrations to open the Outbound integrations catalog. Under Messaging, click the Slack card.
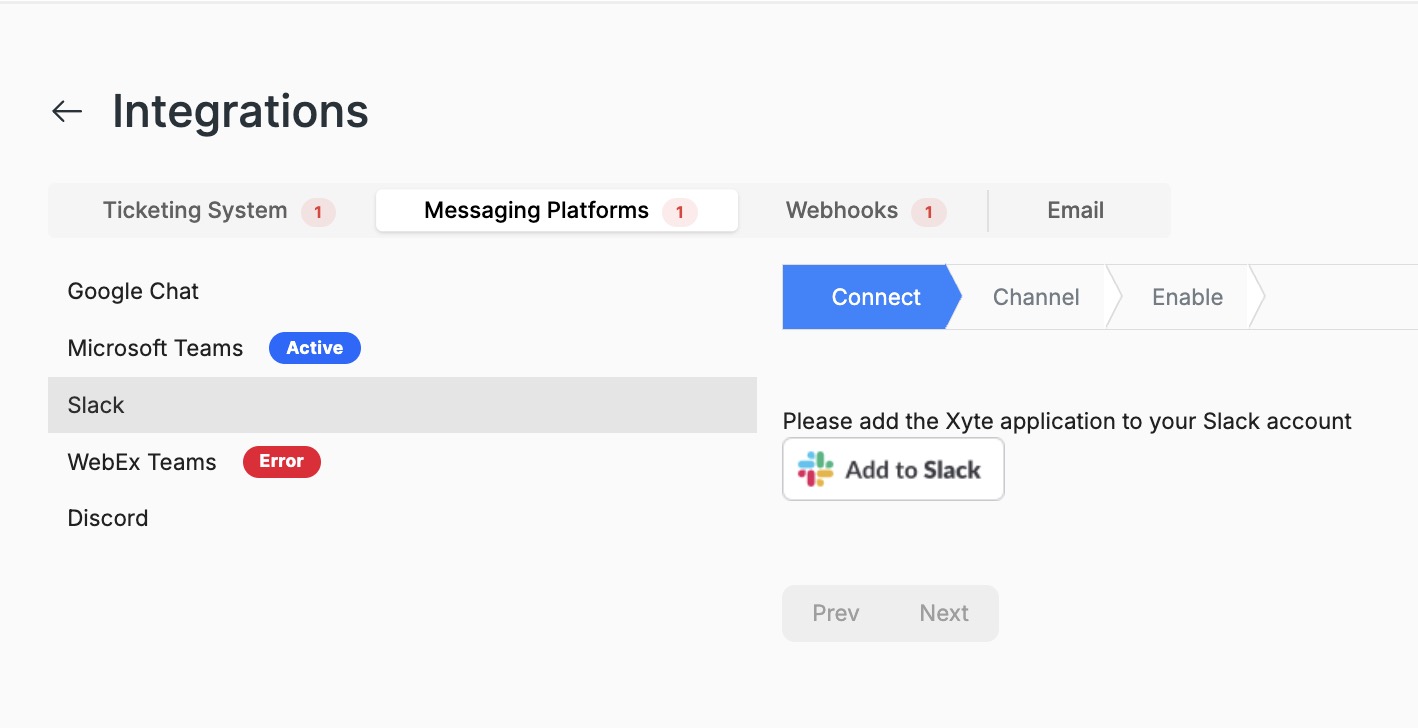
This opens the Slack settings page on the Messaging Platforms tab, where setup runs as a wizard: Connect → Channel → Messages → Filtering → Enable. Messages lets you customize the notification text and thread incident updates (see the Customize messages tab) and Filtering limits which incidents are reported (see the Filter by priority tab) — both are optional and can be set later.
Step 1 — Connect
On the Connect stage, click Add to Slack.
Slack opens an authorization screen. Select your Workspace, review the permissions the Xyte app requests, and click Allow.
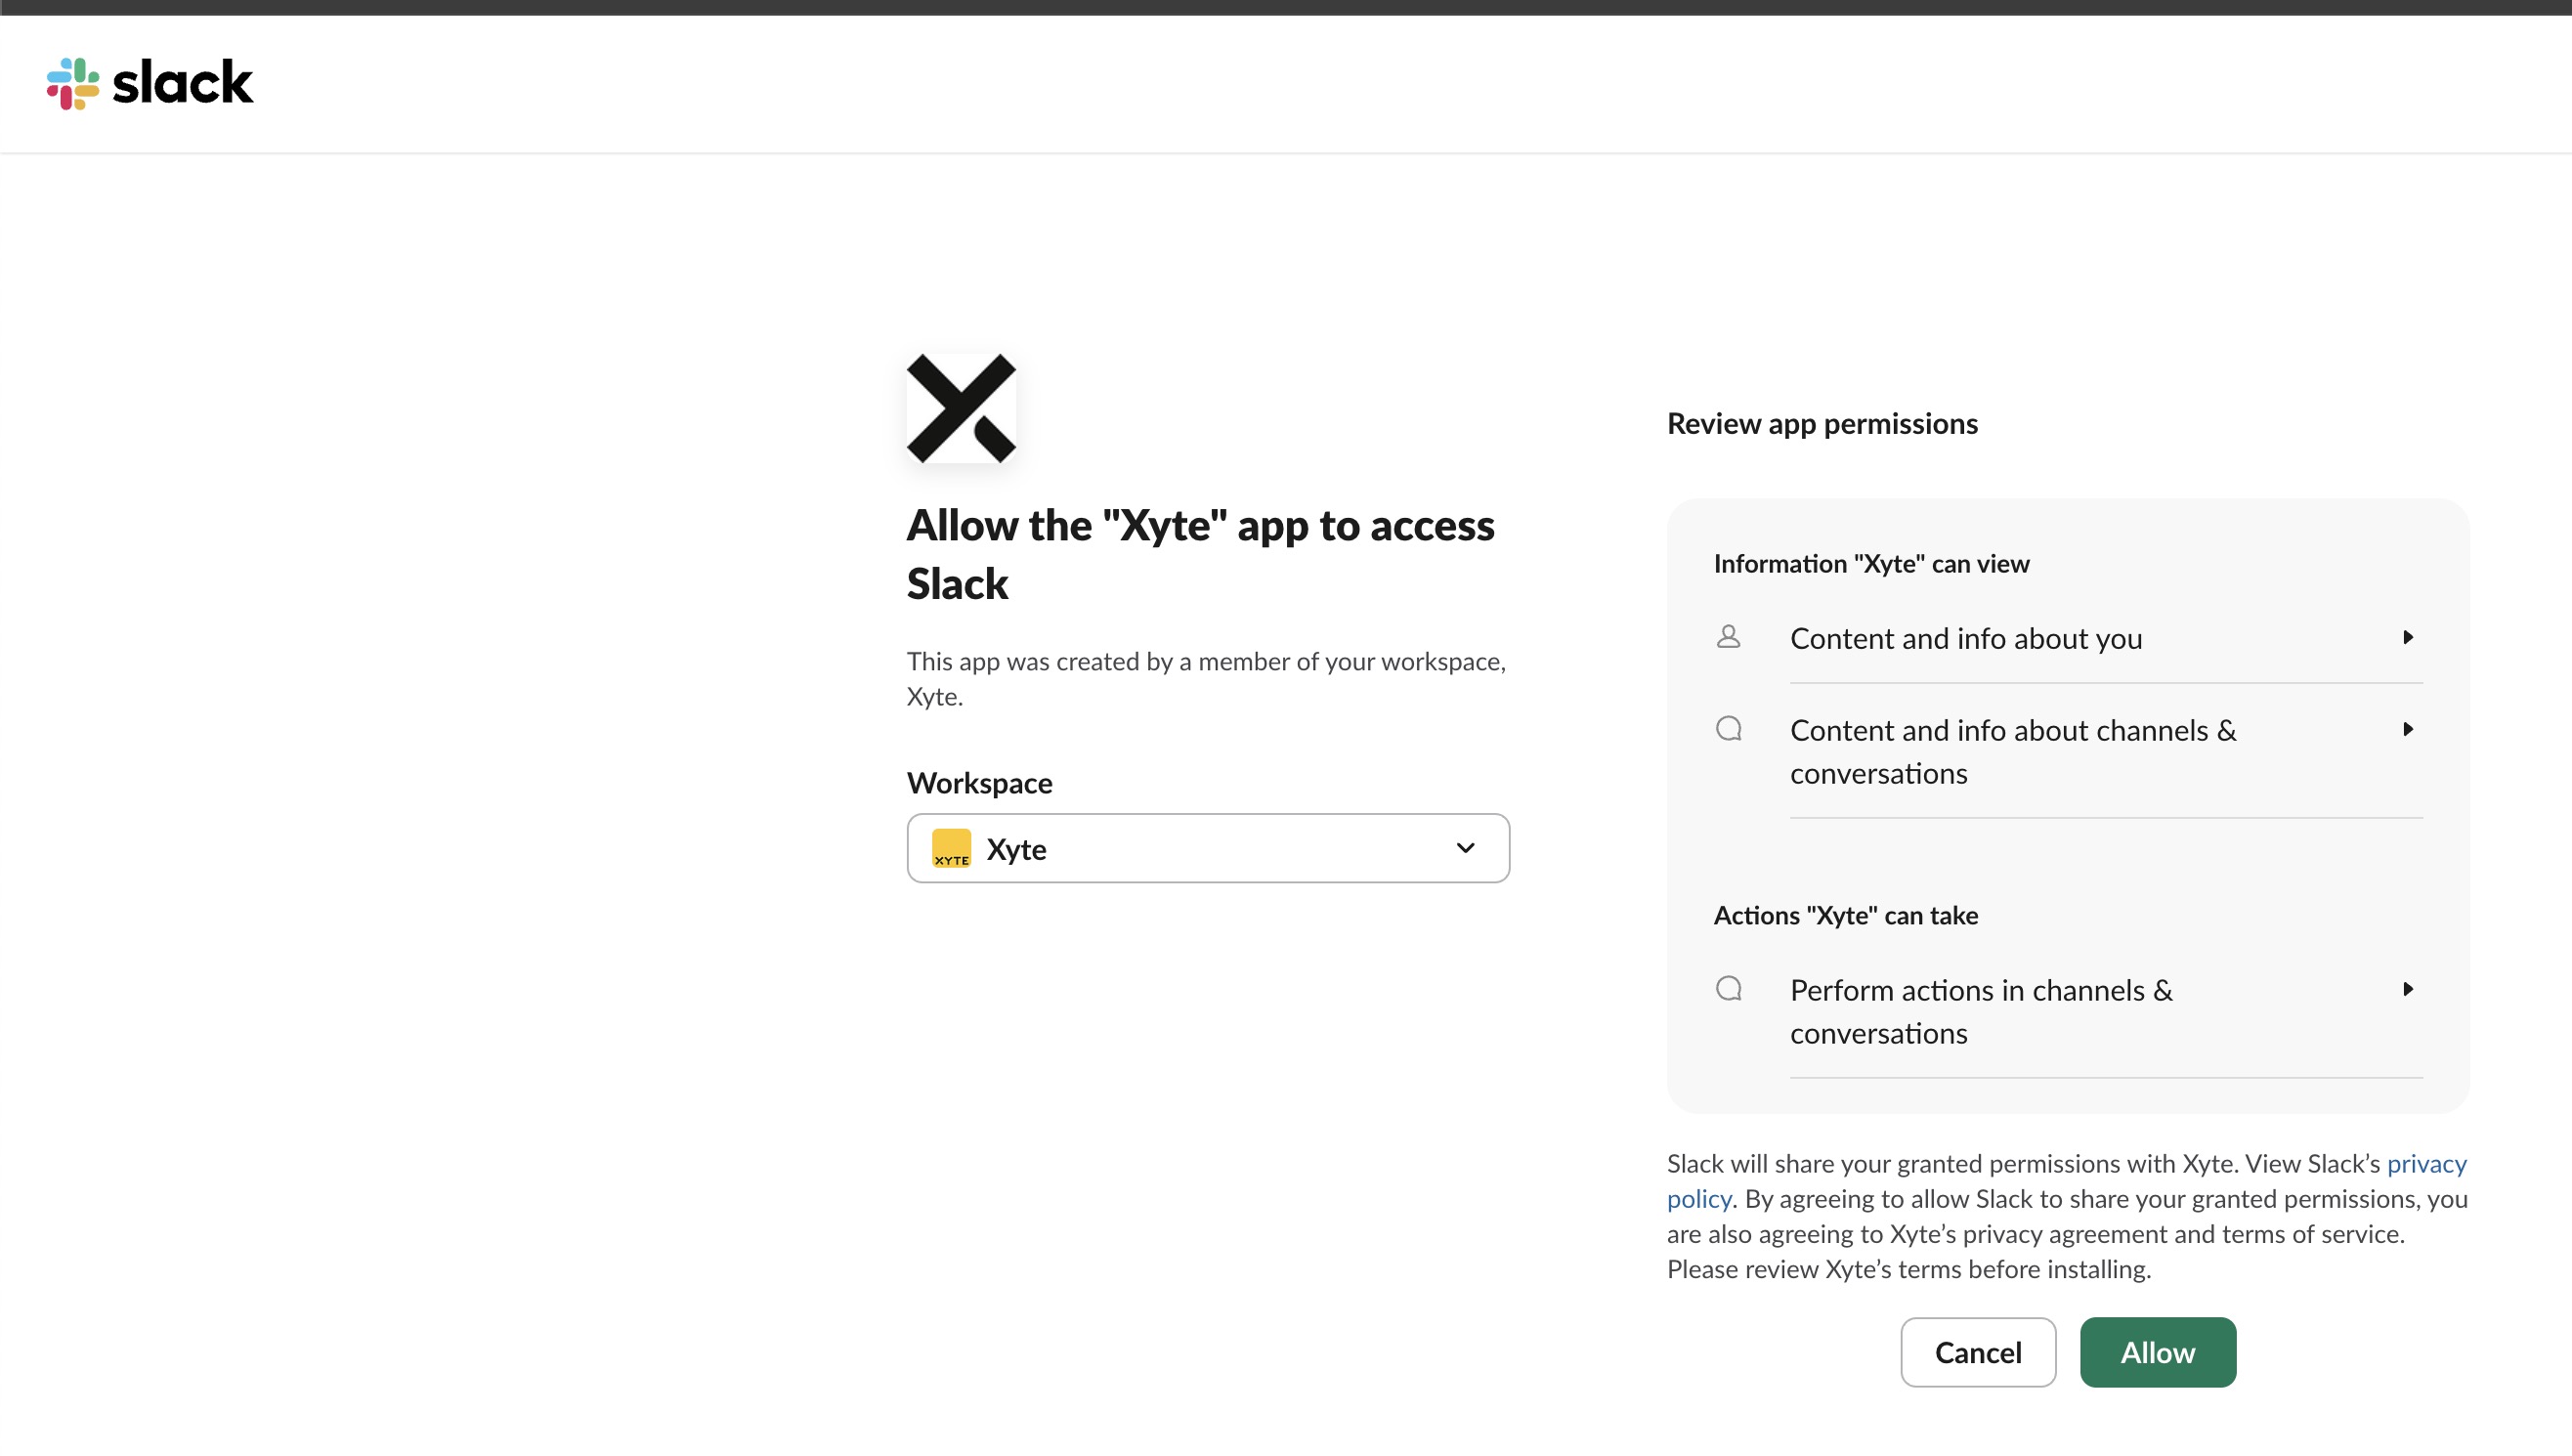
You're returned to Xyte and the wizard advances to the Channel stage.
Step 2 — Channel
Open the Default Channel (Public channels) dropdown and choose the channel that should receive notifications (for example, tech_support), then click Update to save it.
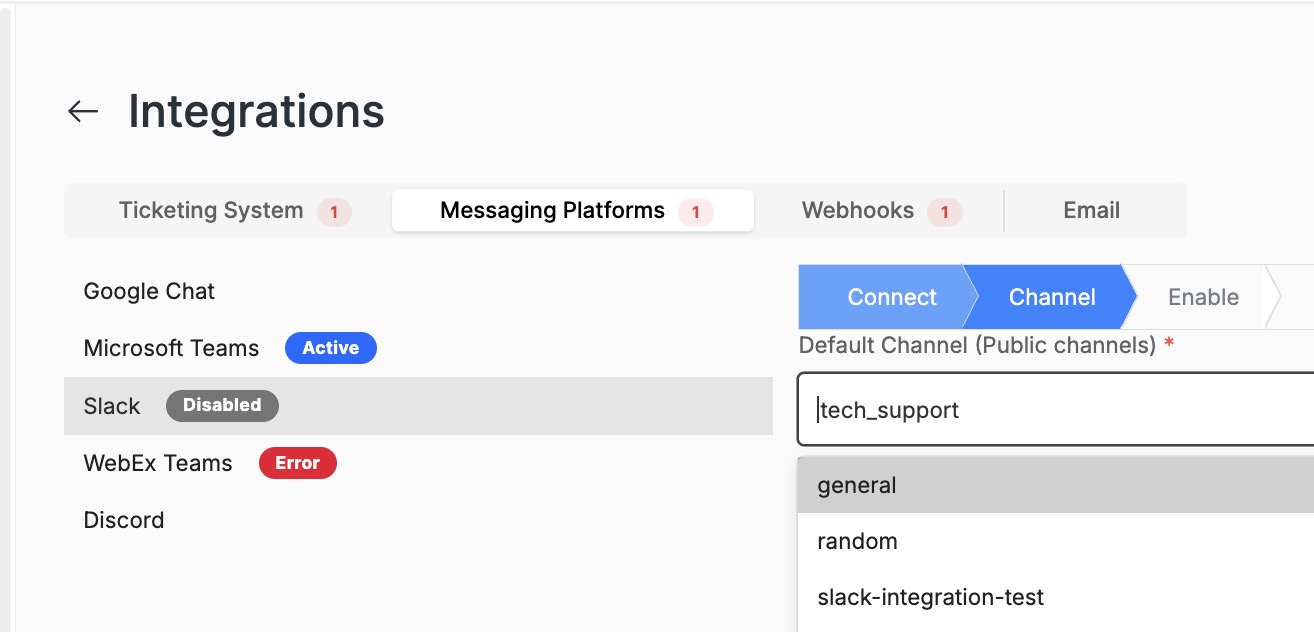
Click Update, not NextUpdate is what saves the channel. Next only moves to the following stage, so if you pick a channel and click Next, the channel is not saved — the Enable stage stays unavailable and saving on the later stages can fail. If in doubt, come back to Channel and confirm the channel you picked is still selected.
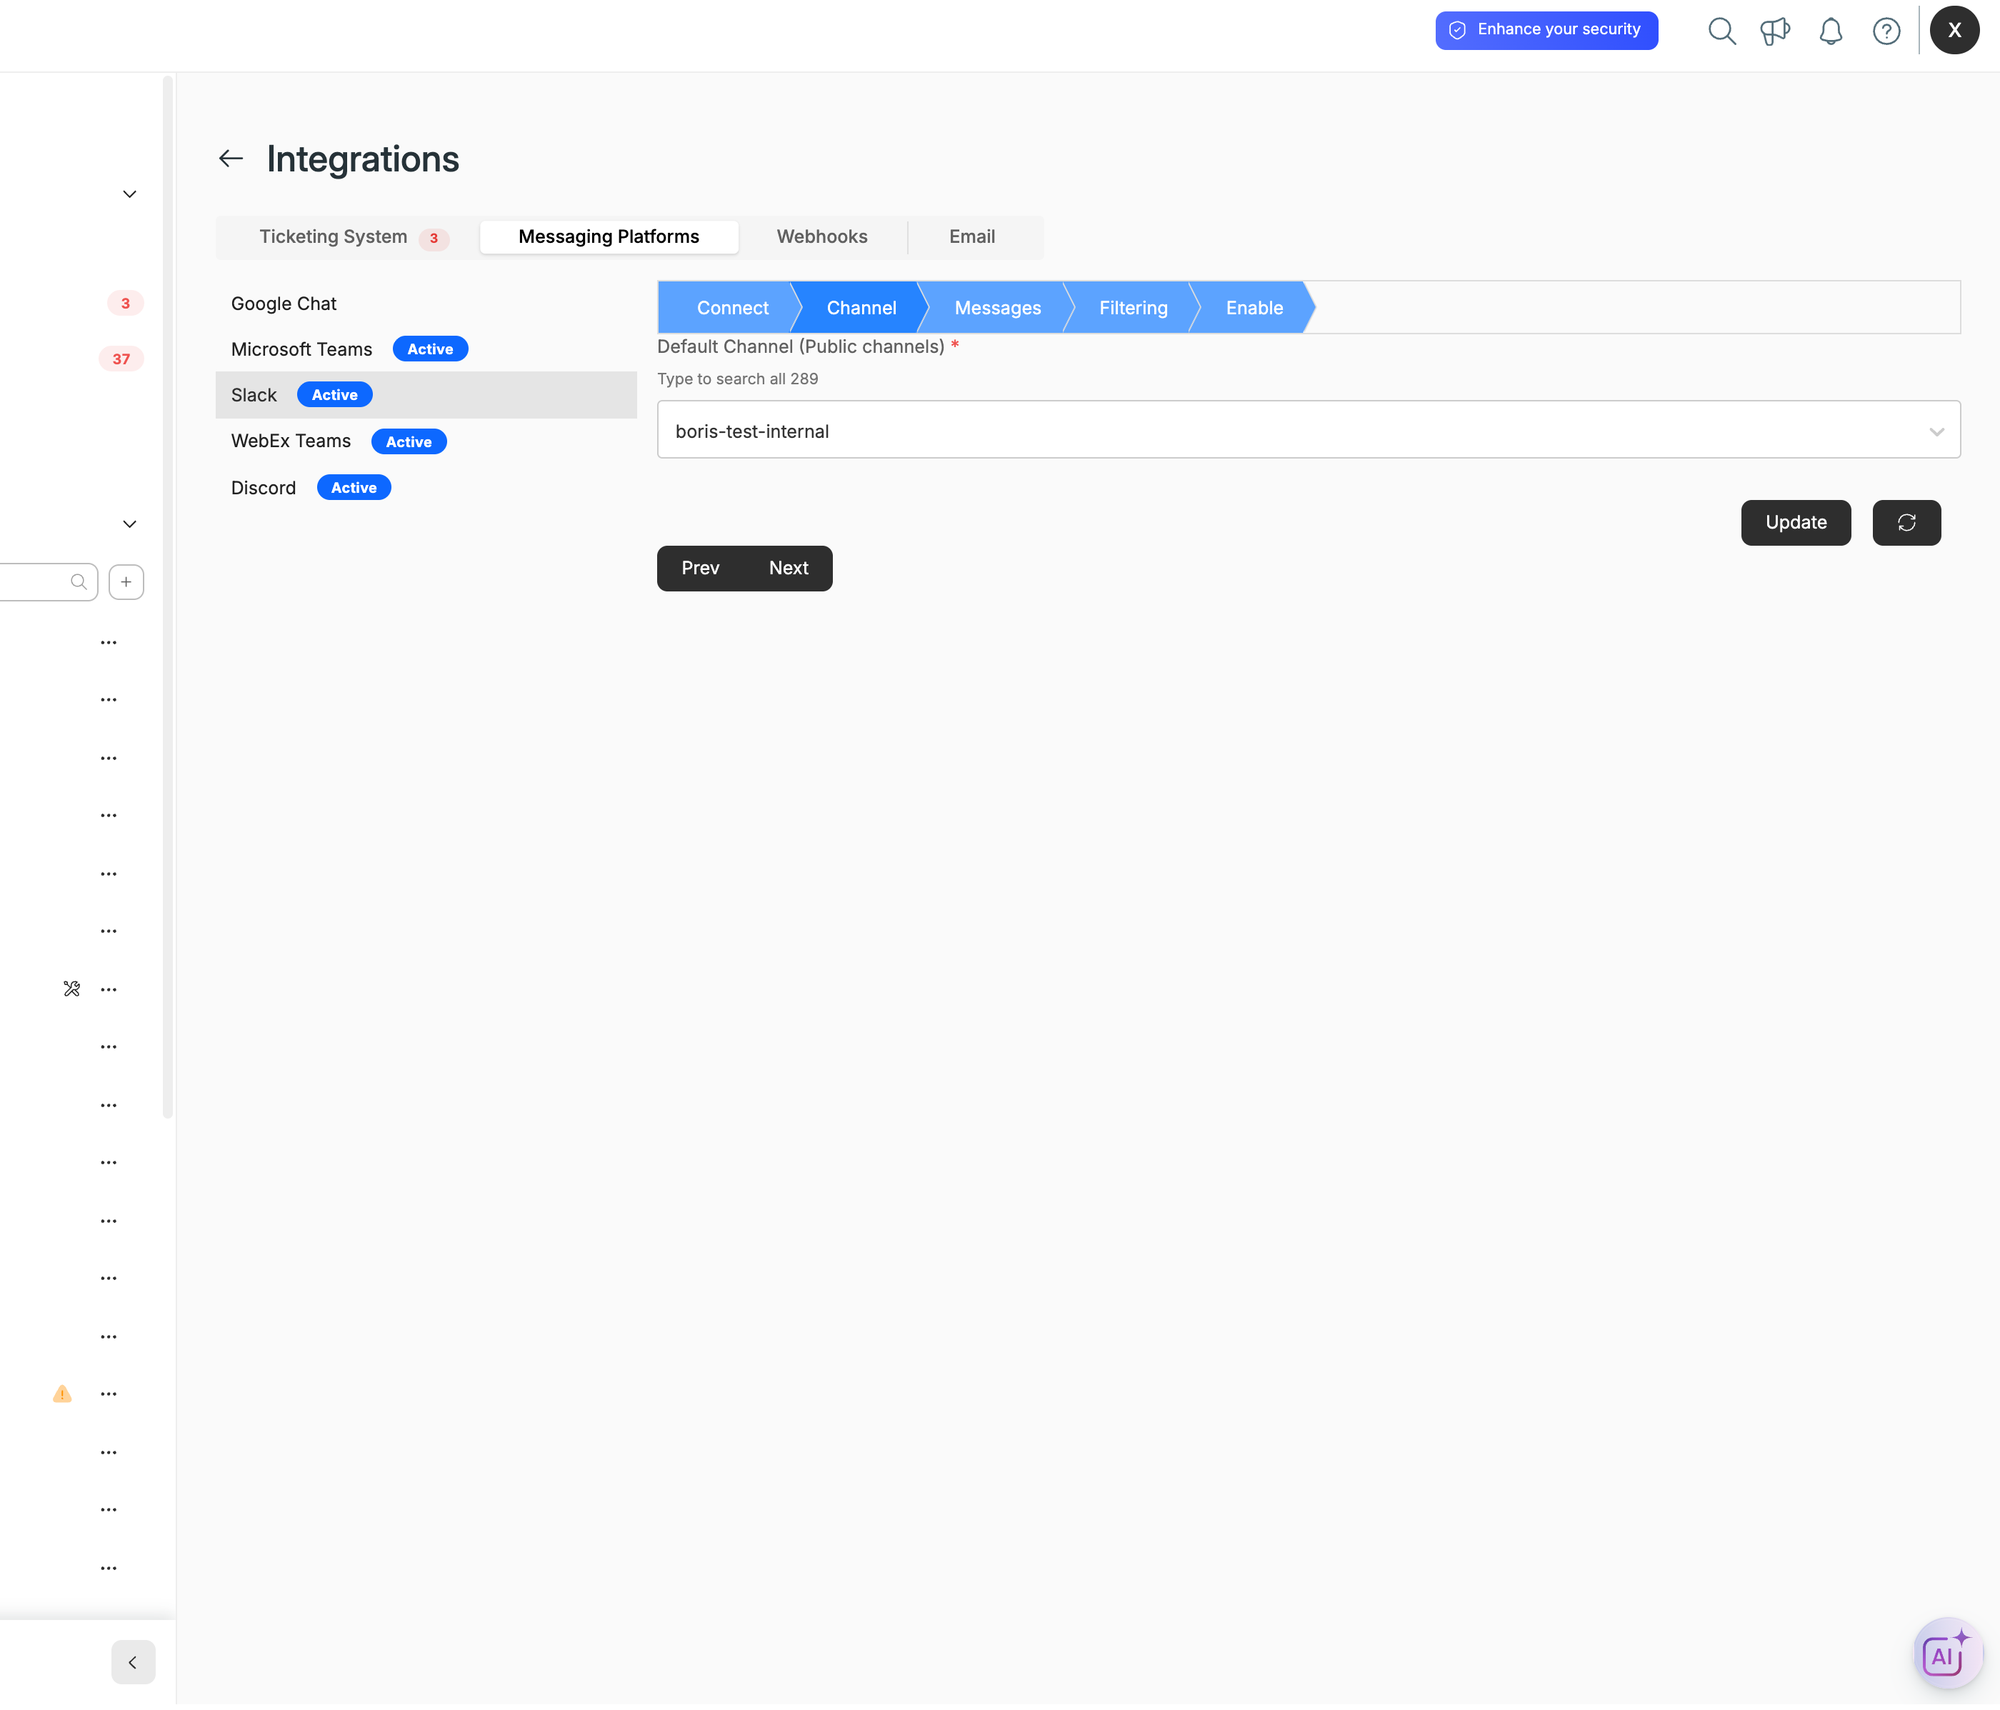
Only public channels are listed. To post to a private channel, invite the Xyte app to that channel in Slack first.
Step 3 — Messages and Filtering (optional)
With the channel saved you can go straight to Enable. The two stages in between are optional and can be revisited at any time:
- Messages — customize the opened / closed / updated messages and choose how follow-up messages are threaded. See the Customize messages tab.
- Filtering — report only incidents at or above a chosen priority. See the Filter by priority tab.
Each of these stages saves with its own button (Save templates / Save filtering).
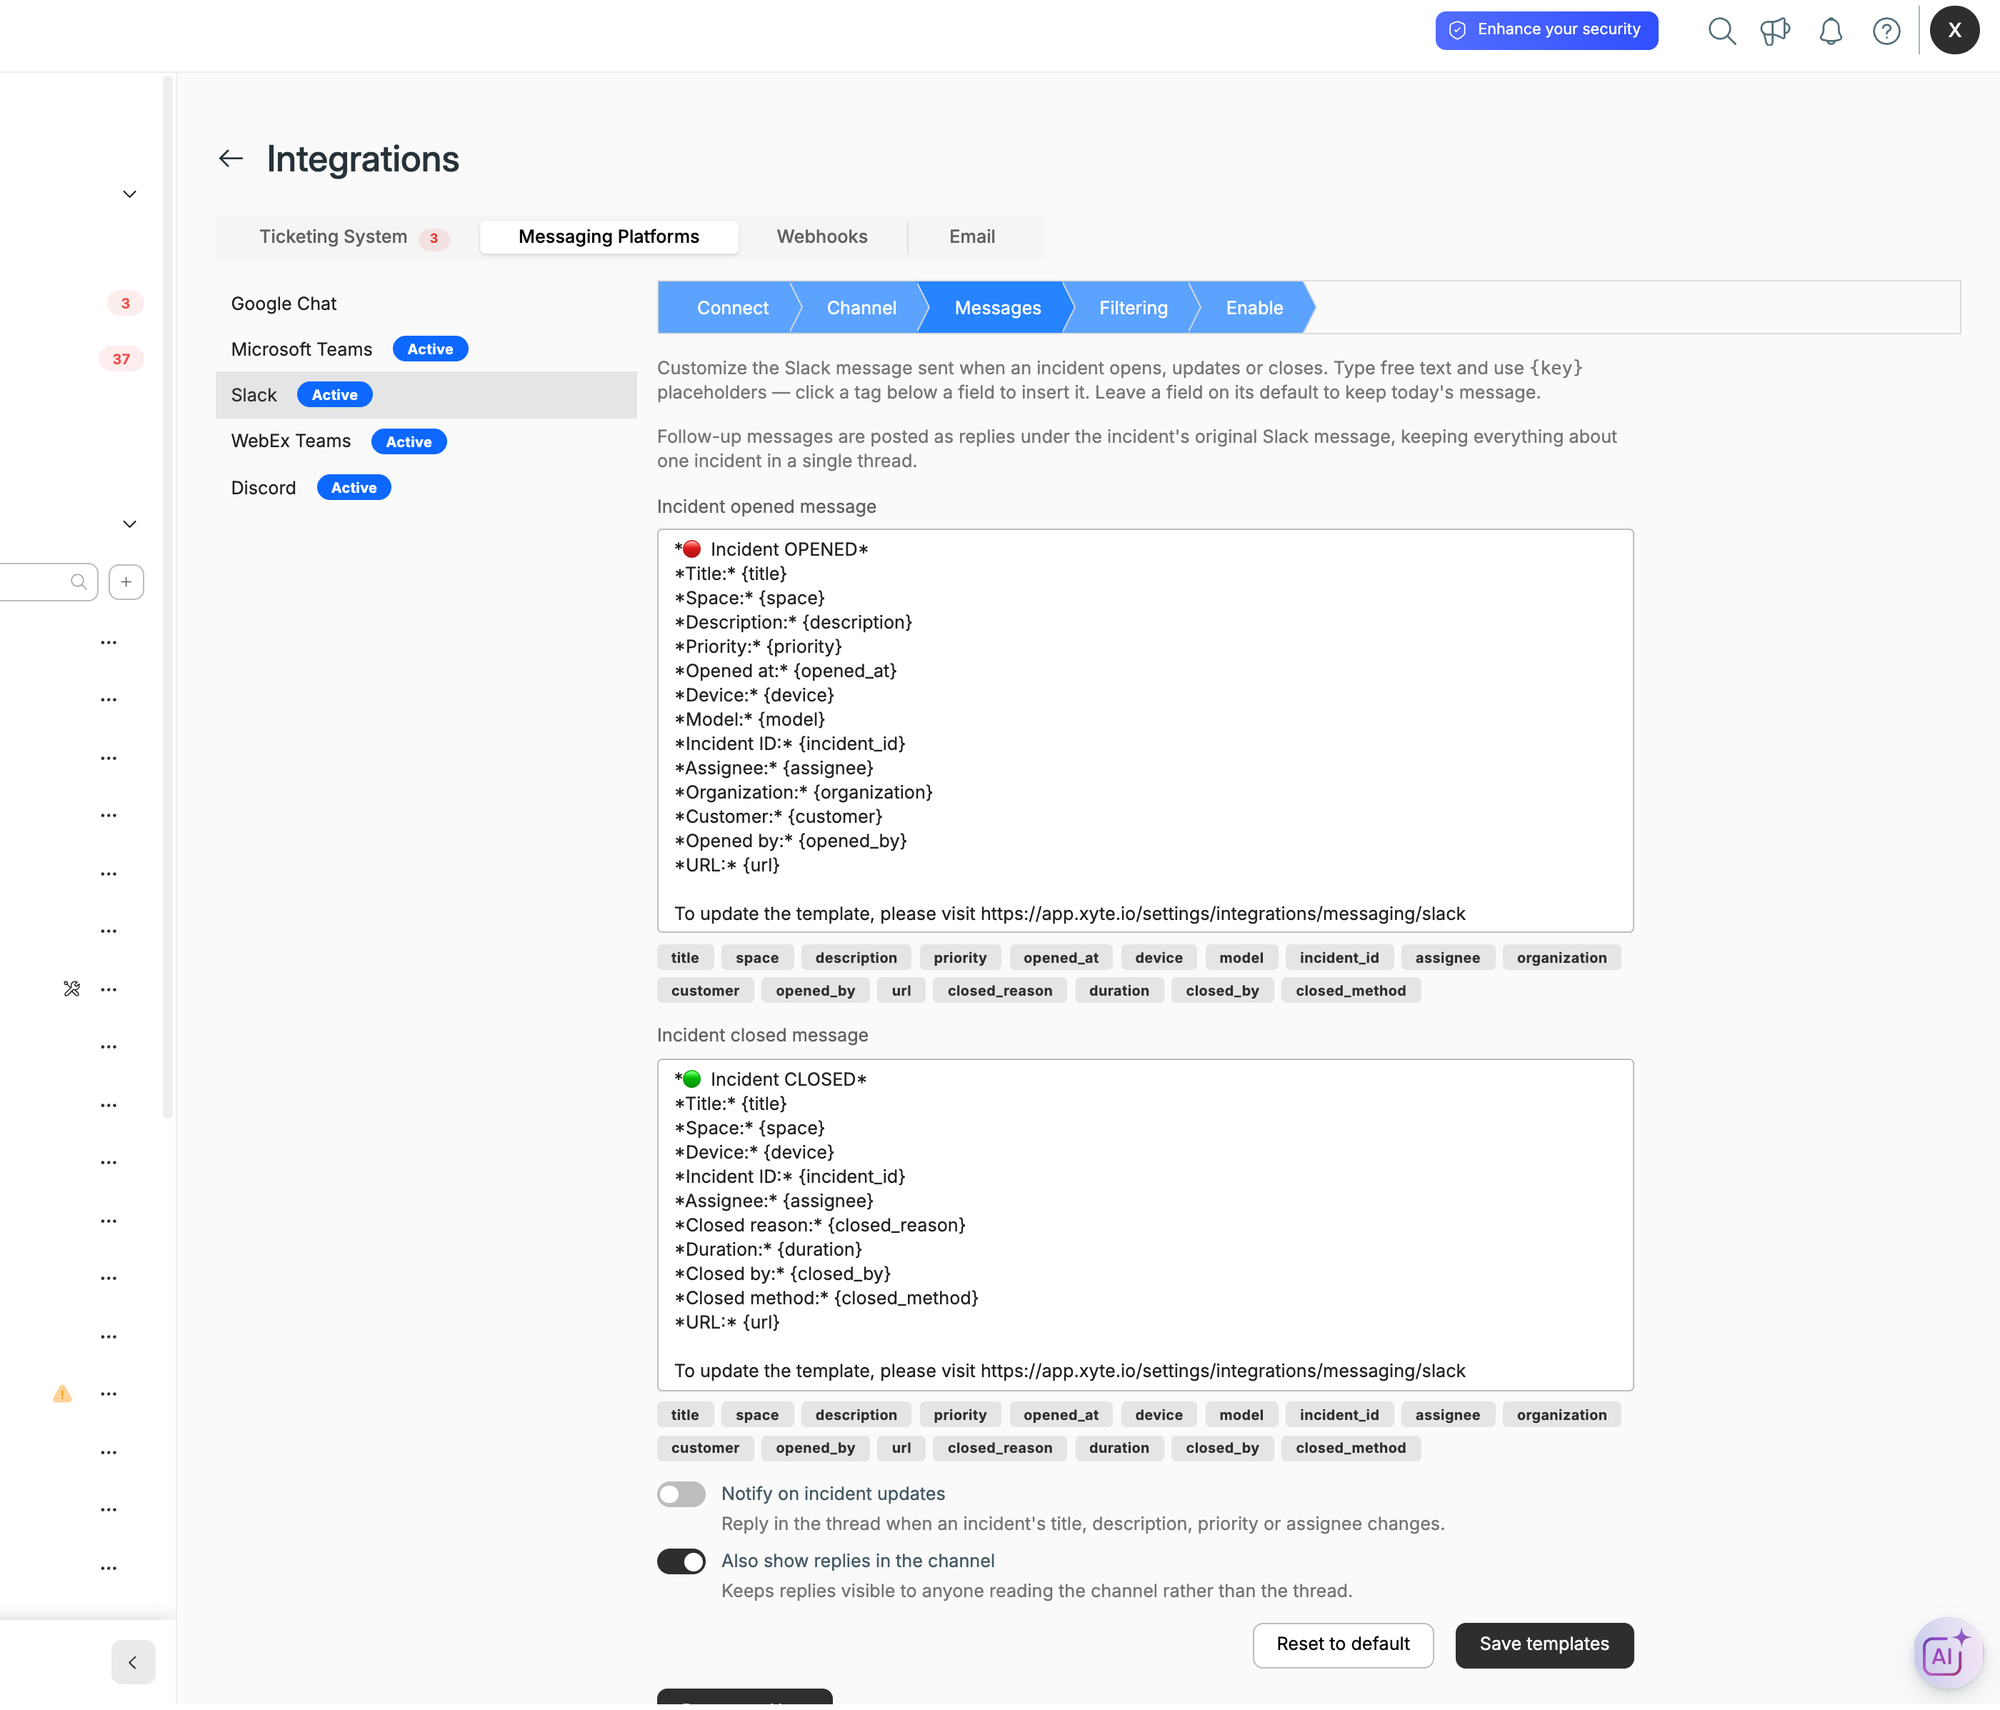
The Messages stage — each incident event has its own template, and the placeholder chips
under a field insert a {token} into it:
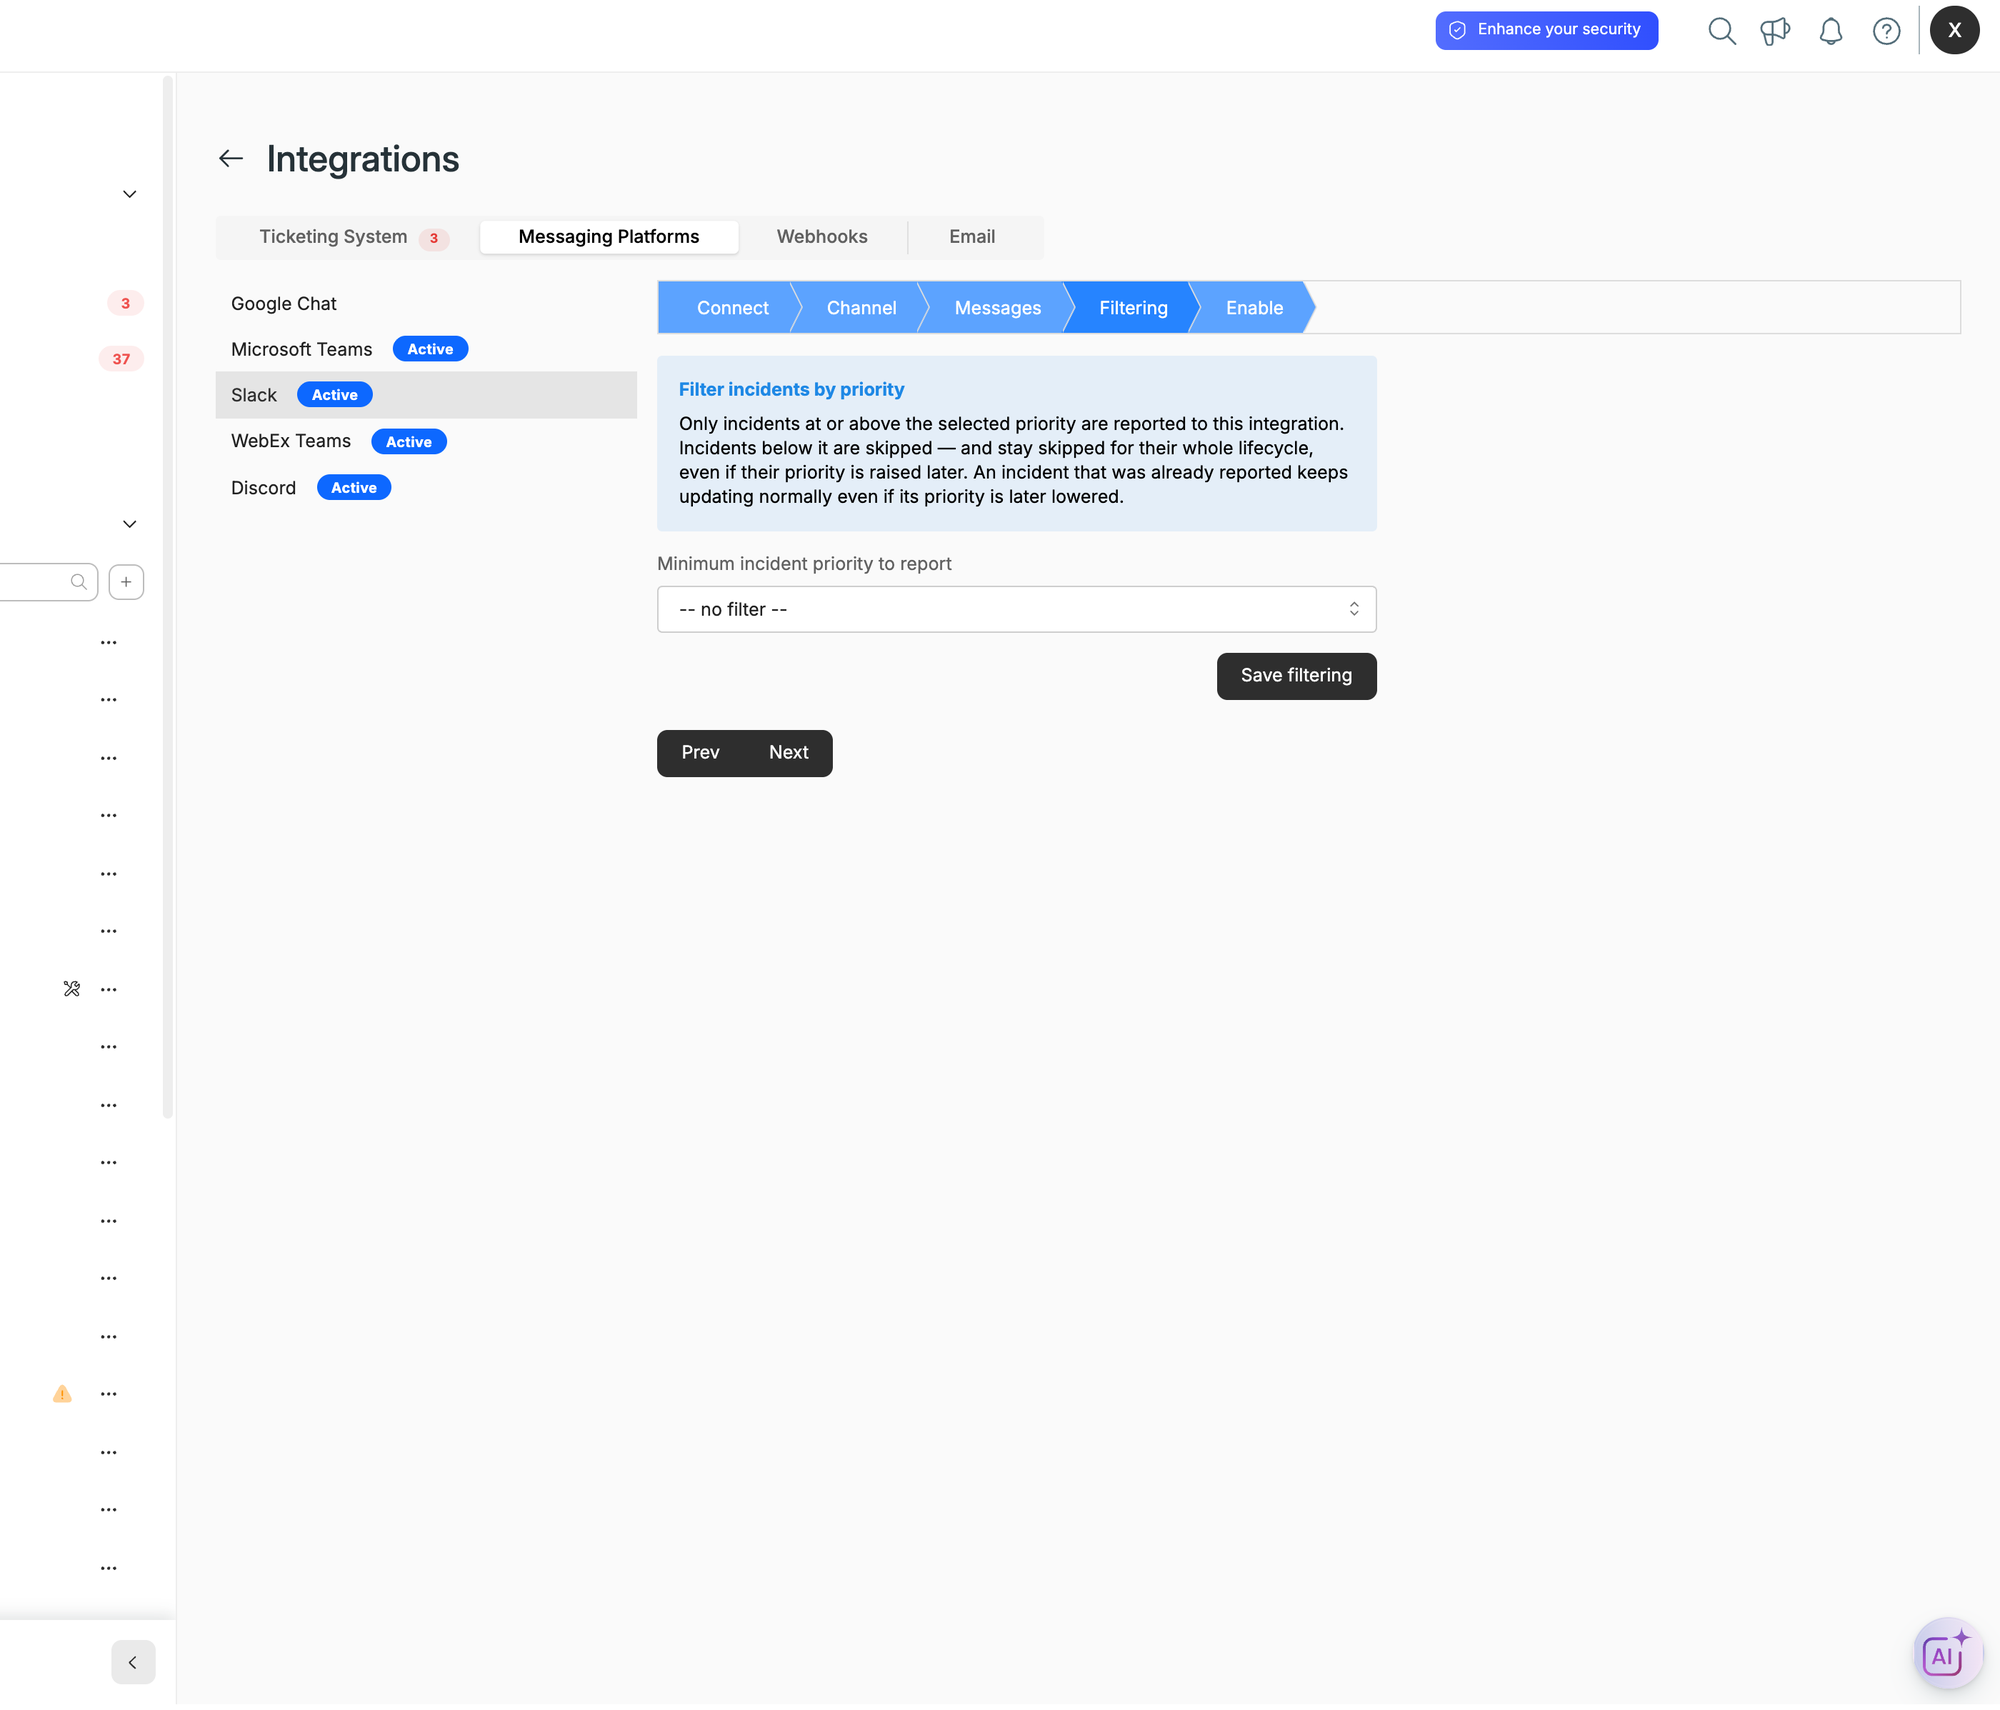
The Filtering stage — pick a minimum incident priority and click Save filtering:
Step 4 — Enable
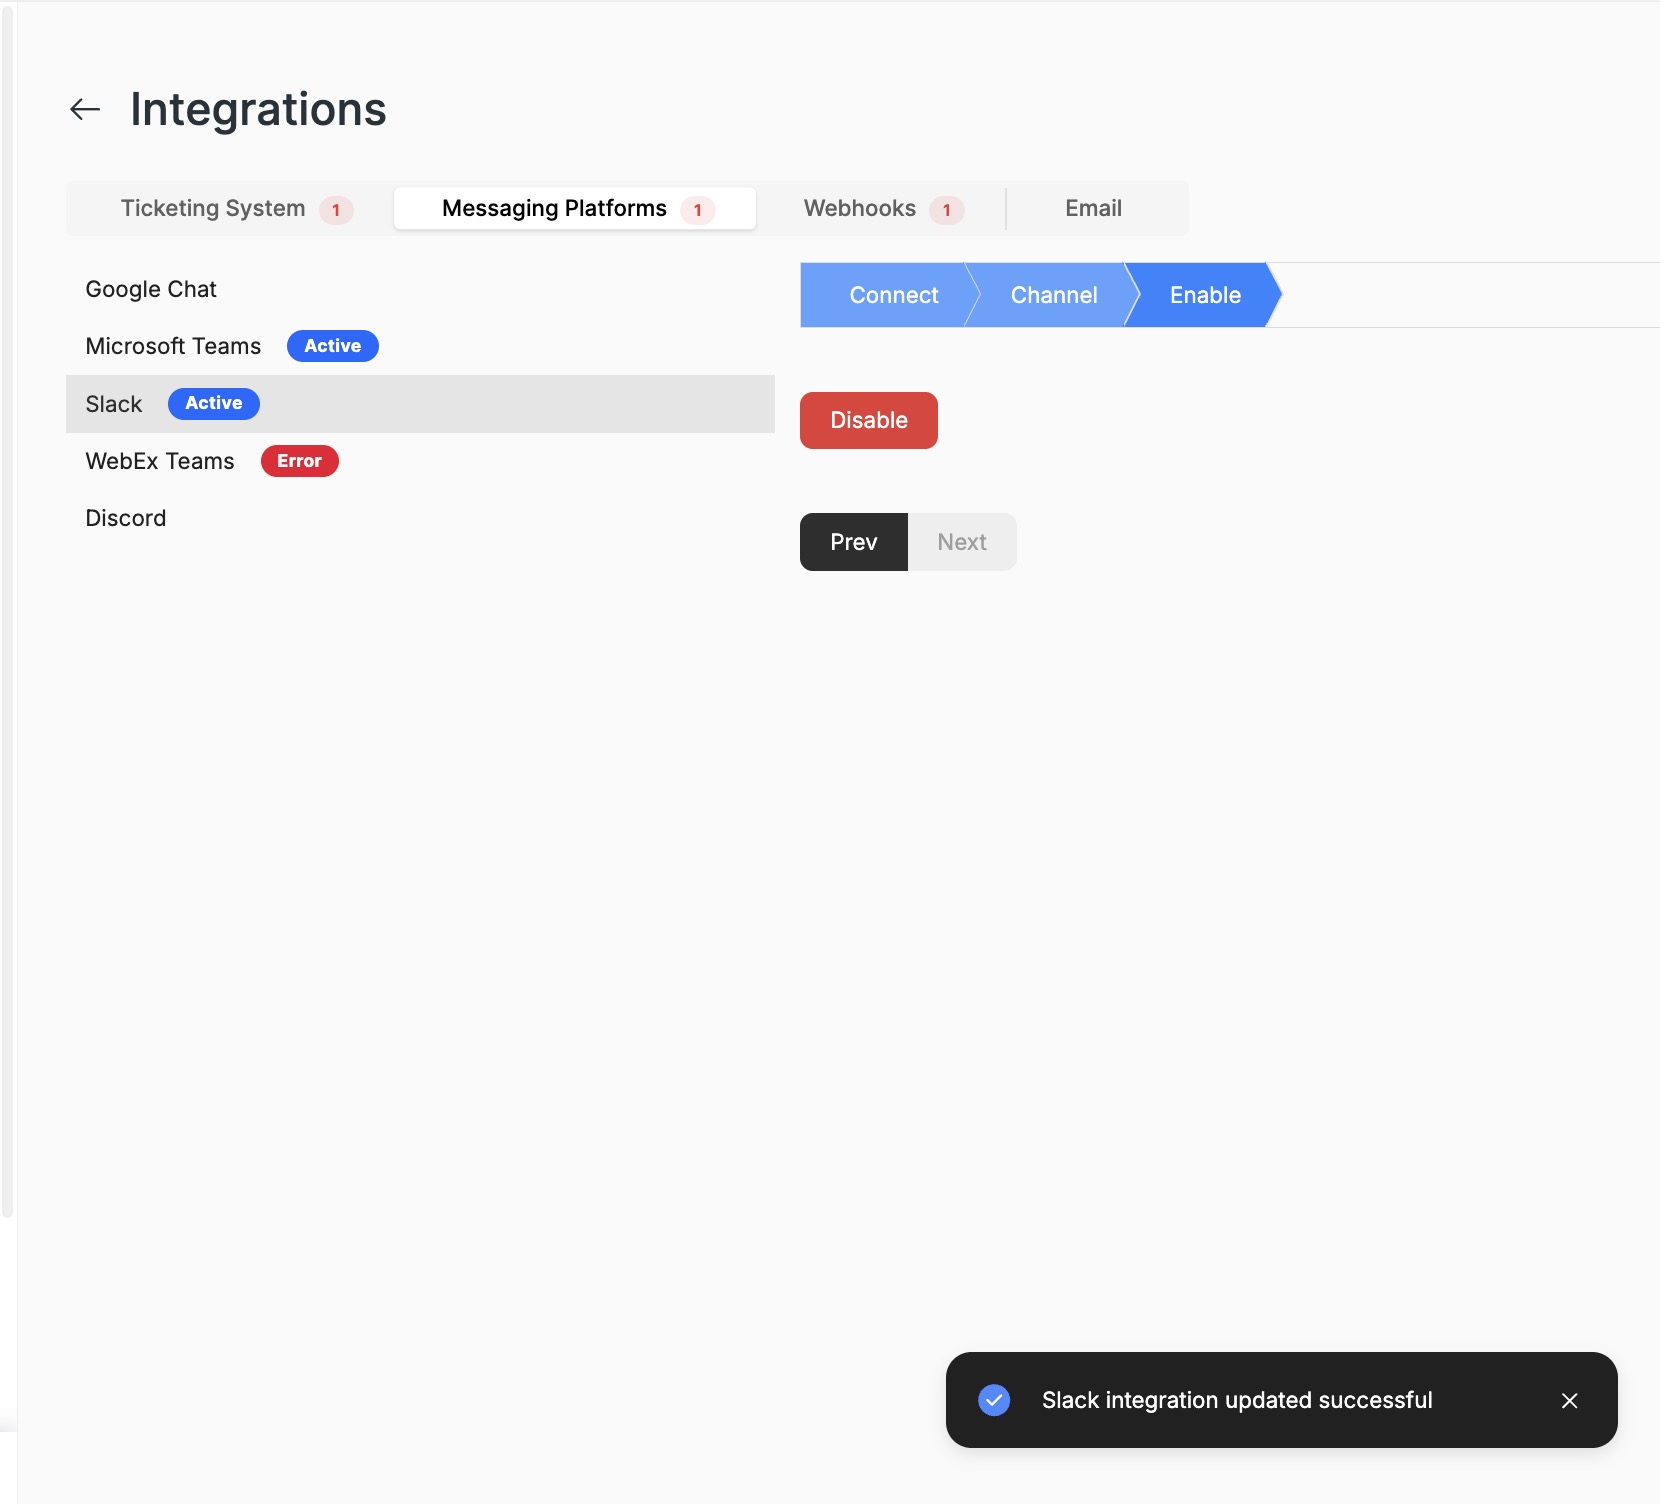
On the Enable stage the integration starts as Disabled. Click Activate.
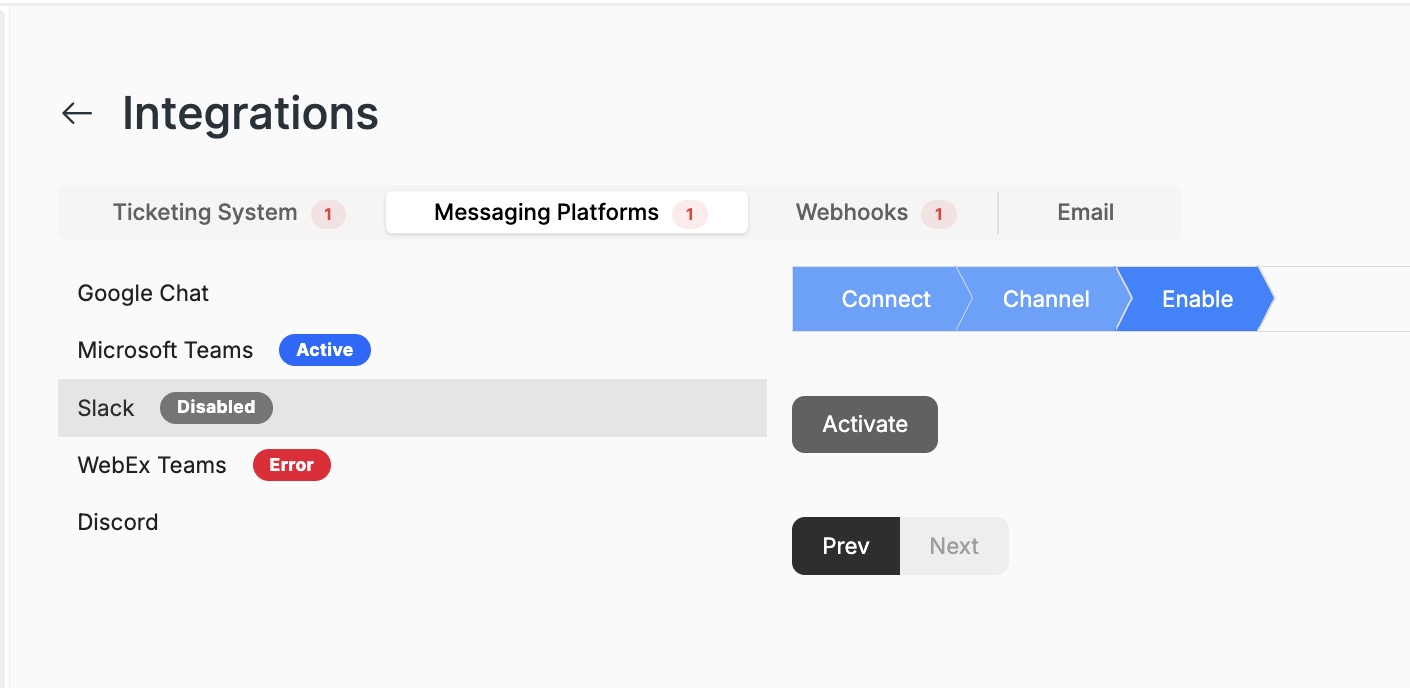
The status changes to Active and a confirmation message appears. To turn the integration off later, click Disable on this same stage.
Step 5 — Test the integration
Once the integration is Active, confirm everything is wired up by sending a test incident. No real fault is needed — pick any device and use its Report Incident capability to raise one. Xyte posts the test incident to your selected channel exactly like a live one.
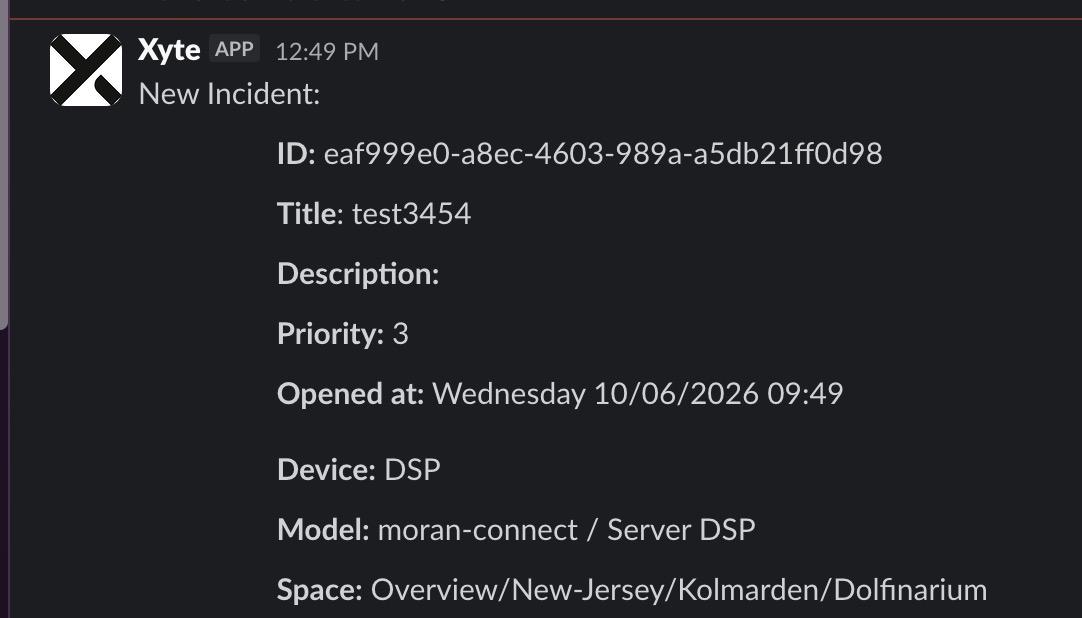
Report the incident from the device, then open your Slack channel. You should see a New Incident message with all of its details — ID, Title, Description, Priority, Opened at, Device, Model, and Space:
If the message appears in the channel, the integration is working. If nothing arrives, check that the integration shows Active, that the correct channel is selected, and (for private channels) that the Xyte app has been invited to the channel.
Customize the message (templates)
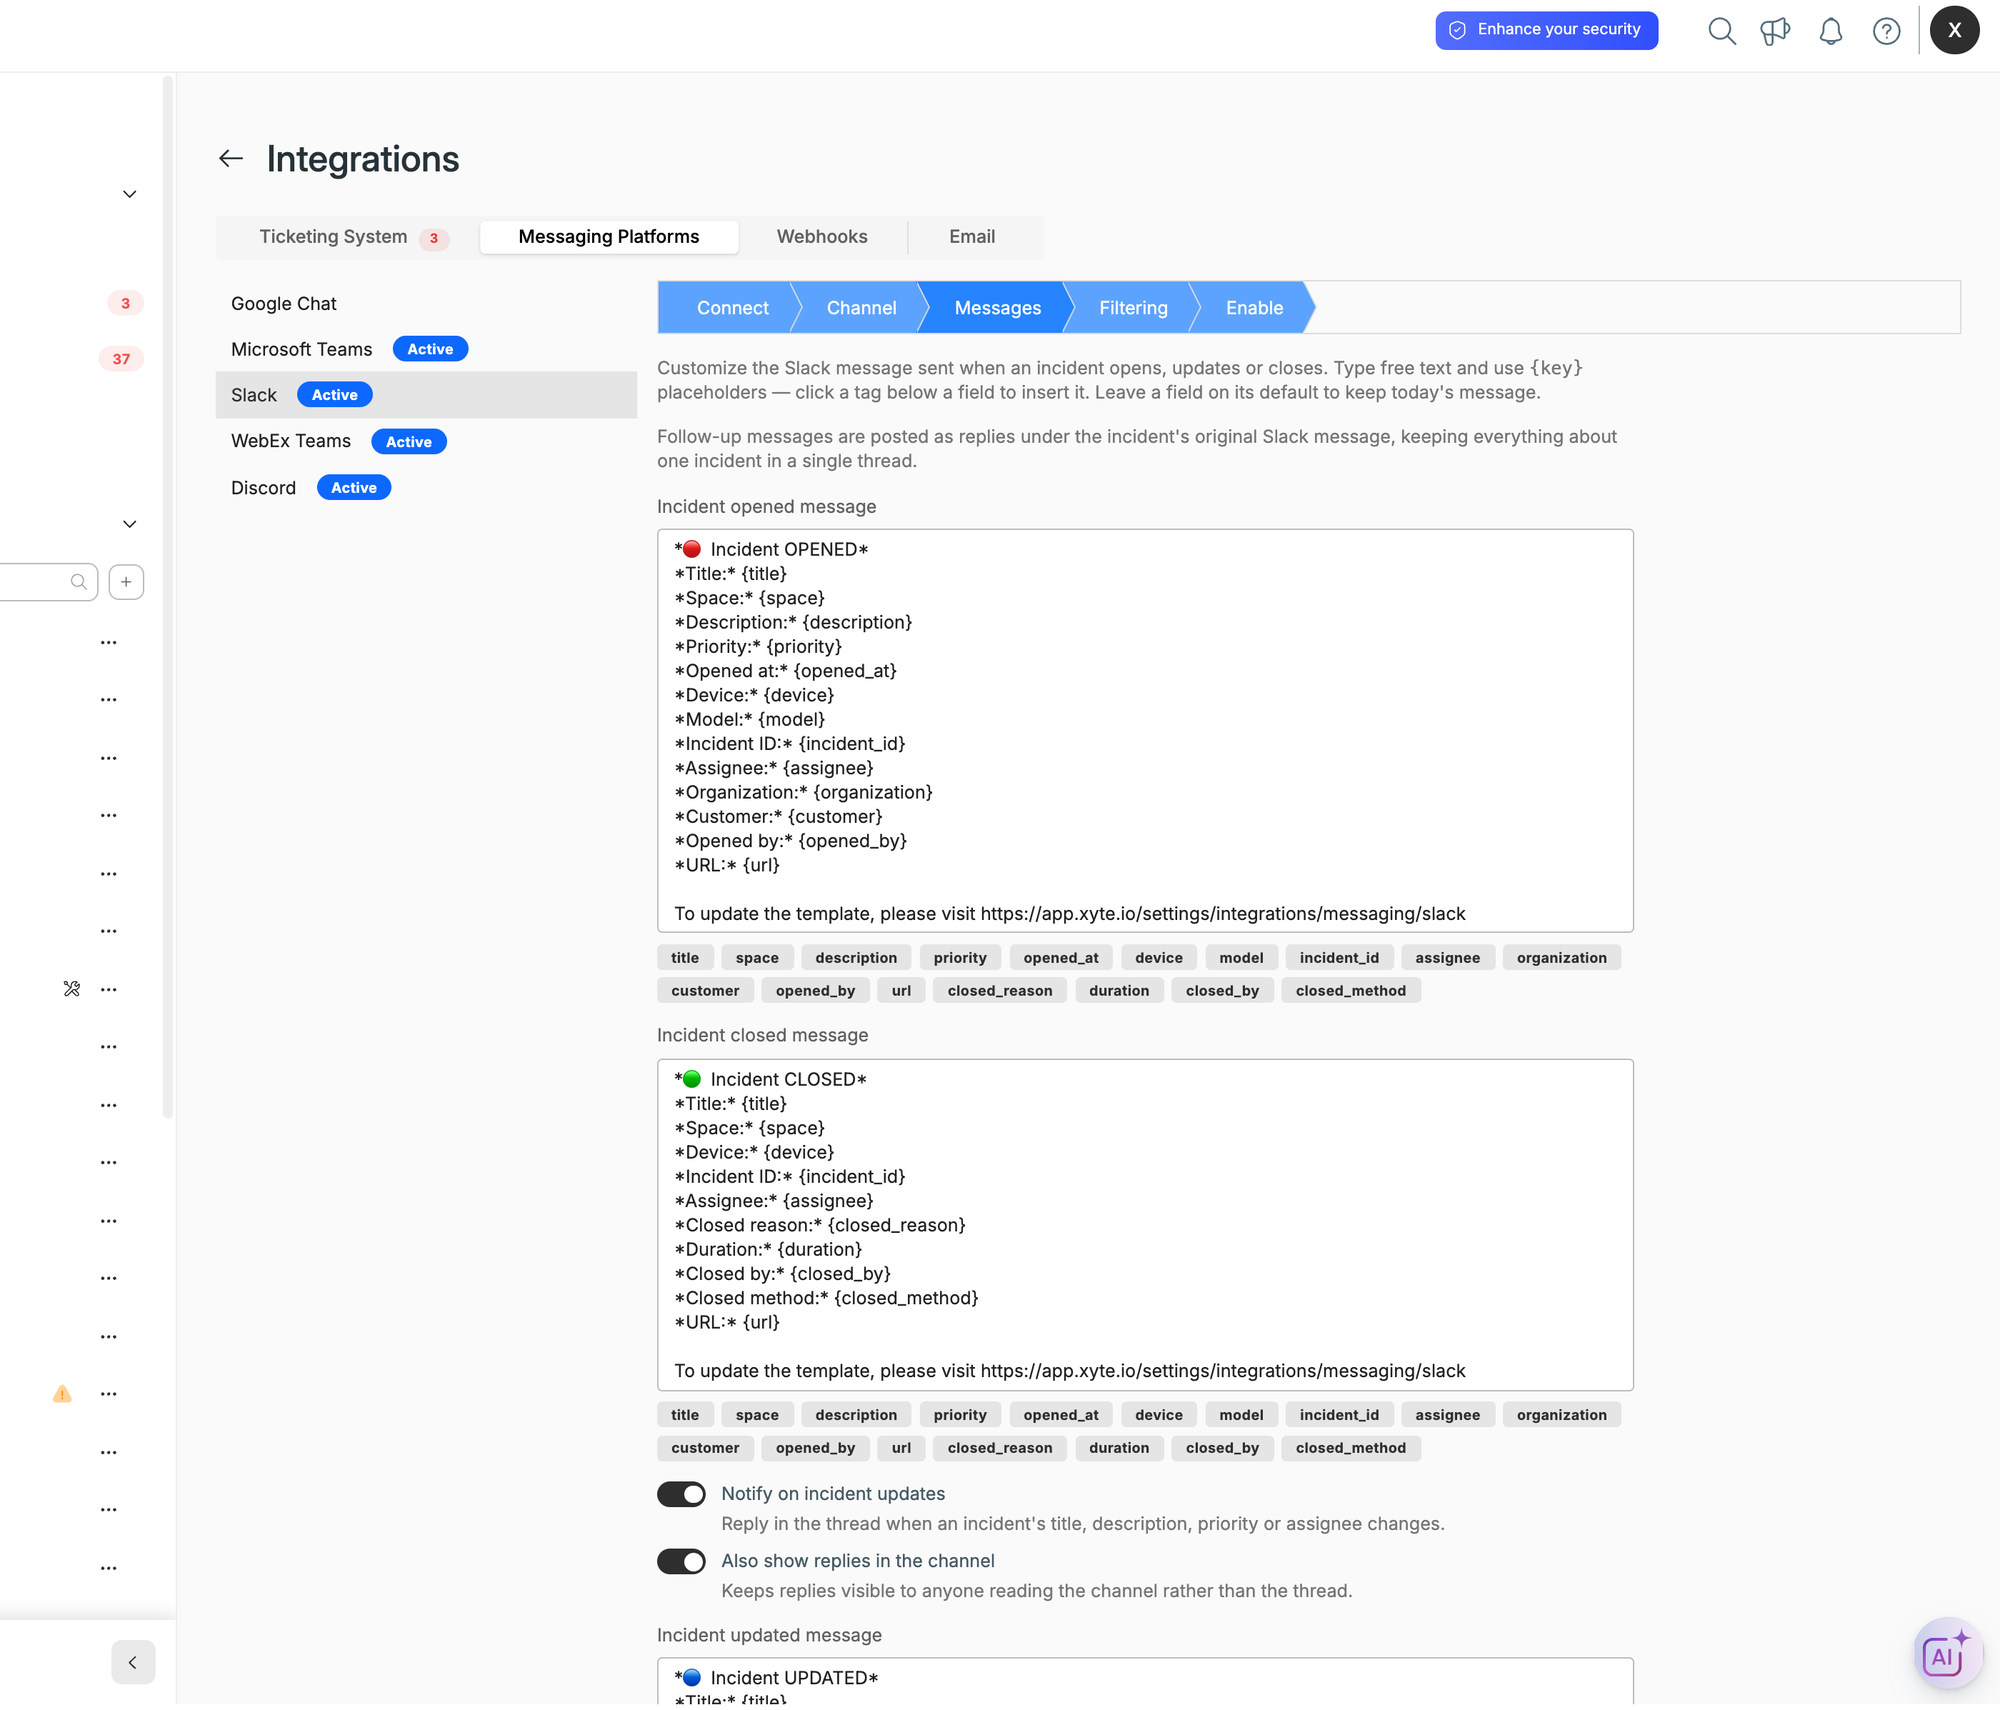
You control exactly what the Slack messages say. On the Slack settings page, open the Messages stage. There are independent templates per event:
- Incident opened message — sent when an incident is raised.
- Incident closed message — sent when it is resolved.
- Incident updated message — sent while the incident is still open, when Send update notifications is on (see below).
Each is free text with {placeholder} tokens that are replaced with the incident's values when the message is sent. Every field starts pre-filled with the default template — the standard message with every field, ending with a link back to this settings page. Edit the text and click Save templates, or click Reset to default to restore the original.
Save templates is what stores your text. Moving on with Next leaves the edits unsaved.
- If every placeholder on a line is empty for a given incident, the whole line is dropped from the message — so a template laid out one field per line never shows empty rows.
- An unrecognized
{token}(a typo, for example) is sent as written, so the mistake is visible in the message. - A very long value (a 1000-character description, say) is truncated with an ellipsis to stay inside the platform's message limit.
- Slack formatting works: wrap text in
*asterisks*for bold, and use<{url}|Open in Xyte>for a labeled link. - Click any placeholder chip below a field to insert it at the end of that template.
Threads and update notifications
Two checkboxes on the same Messages stage control what happens after the opening message. Slack is the only messaging platform that supports this, because it is the one whose API lets Xyte reply to a specific message.
- Reply in threads — on by default. The closing message, and any update messages, are posted as replies in the thread of the incident's opening message, so everything about one incident stays in a single thread and the channel shows one message per incident. Untick it to post them directly in the channel as separate messages instead.
- Send update notifications — off by default. Tick it to send a message whenever an incident's title, description, priority or assignee changes. Ticking it reveals the Incident updated message template.
Click Save templates to store the checkboxes together with the templates.
Replies no longer appear in the channel as wellReplies in a thread are shown in the thread only. The earlier Also show replies in the channel option has been removed. If your team follows the channel rather than threads, untick Reply in threads so closing and update messages are posted directly in the channel.
Available placeholders
| Placeholder | Description | Example | Opened | Updated | Closed |
|---|---|---|---|---|---|
{title} | Incident title | Camera offline | ✅ | ✅ | ✅ |
{space} | Full space path of the device | HQ / Floor 3 / Room 301 | ✅ | ✅ | ✅ |
{description} | Incident description | Device stopped responding | ✅ | ✅ | |
{priority} | Priority — Critical, High, Moderate, Low, or Planning | High | ✅ | ✅ | |
{opened_at} | When the incident opened (device time zone) | 05/06/2026 16:26 UTC | ✅ | ||
{device} | Device name | Front Lobby Camera | ✅ | ✅ | ✅ |
{model} | Vendor / model | Axis / P3245 | ✅ | ||
{incident_id} | Short incident ID | 4821 | ✅ | ✅ | ✅ |
{assignee} | Assigned user | Jane Doe | ✅ | ✅ | ✅ |
{organization} | Organization name | Acme Corp | ✅ | ||
{customer} | Customer (top-level space) name | Acme Retail | ✅ | ||
{opened_by} | Who or what opened the incident | Monitoring | ✅ | ||
{url} | Link to the incident in Xyte | https://app.xyte.io/incident/… | ✅ | ✅ | ✅ |
{closed_reason} | Why the incident closed | Device back online | ✅ | ||
{duration} | How long the incident was open | about 2 hours | ✅ | ||
{closed_by} | Who or what closed the incident | System | ✅ | ||
{closed_method} | How it was closed (for example, manually or automatically) | automatically | ✅ |
A placeholder used outside its scope (for example {closed_reason} in the opened or updated message) simply renders blank.
Example
Opened-message template:
🔴 *{title}*
Priority *{priority}* at {space}
Device: {device} ({model})
<{url}|Open in Xyte>
Posts to Slack as:
Camera offlinePriority High at HQ / Floor 3 / Room 301
Device: Front Lobby Camera (Axis / P3245)
Open in Xyte
Report only the incidents that matter
The Filtering stage limits which incidents reach Slack at all. Pick a value under Minimum incident priority to report and click Save filtering:
| Option | Reported to Slack |
|---|---|
| No filter — send everything | Every incident (default) |
| Critical and above | Critical only |
| High and above | Critical, High |
| Moderate and above | Critical, High, Moderate |
| Low and above | Critical, High, Moderate, Low |
| Planning and above | Every incident |
How it behaves:
- An incident below the threshold is skipped, and stays skipped for its whole lifecycle — even if someone raises its priority later, and even for its closing message.
- An incident that was already reported keeps updating normally, even if its priority is later lowered.
- The filter is per integration, so Slack can be noisier or quieter than your other recipients.
- You can also set this for all your integrations at once from the Integrations list.
Routing notifications (per space)
Each space's Routing settings control where that space's notifications are sent.
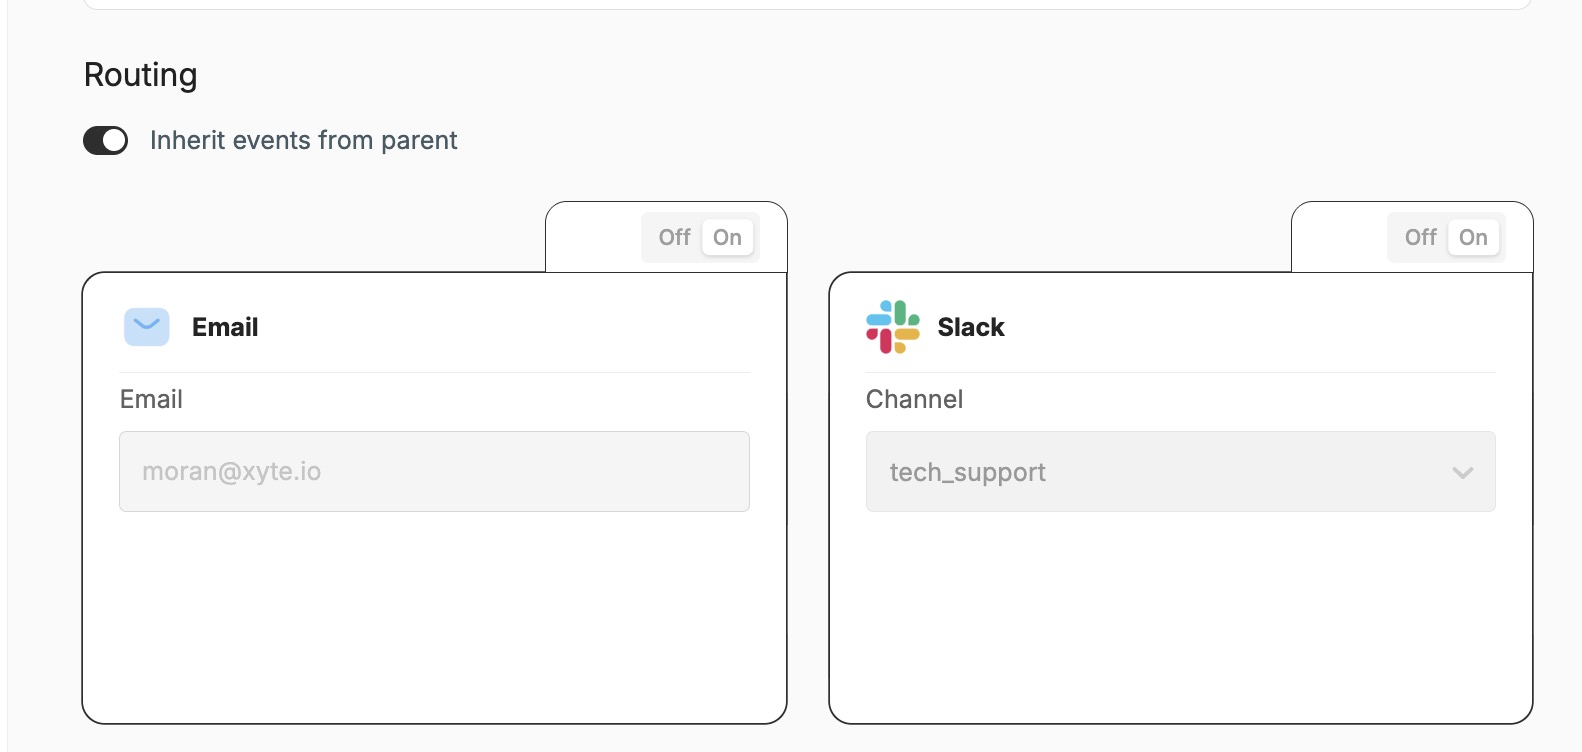
- Inherit events from parent — when enabled, the space uses its parent space's routing, and the recipient cards are read-only.
- For each recipient (Email, Slack), use the Off / On switch to enable it. Turn Inherit settings off to override the inherited configuration, then choose the Channel and click Update.
When Inherit events from parent is on, the Email and Slack cards are locked to the parent's values.
Having trouble with the Slack integration? See the Slack troubleshooting guide.
Updated 27 days ago