Contracts
Manage contracts and set up alerts for expiring warranties.
Contracts are essential for tracking business related agreements on devices. Contracts can cover areas like support, warranties, discounts, etc. Contracts are active for a limited period and can be extended and modified as needed.
The Contracts screen, accessible via the left-hand menu, lists all the contracts across your company along with information about the devices they apply to. Clicking a device will take you to the Contracts tab on the device’s details screen.
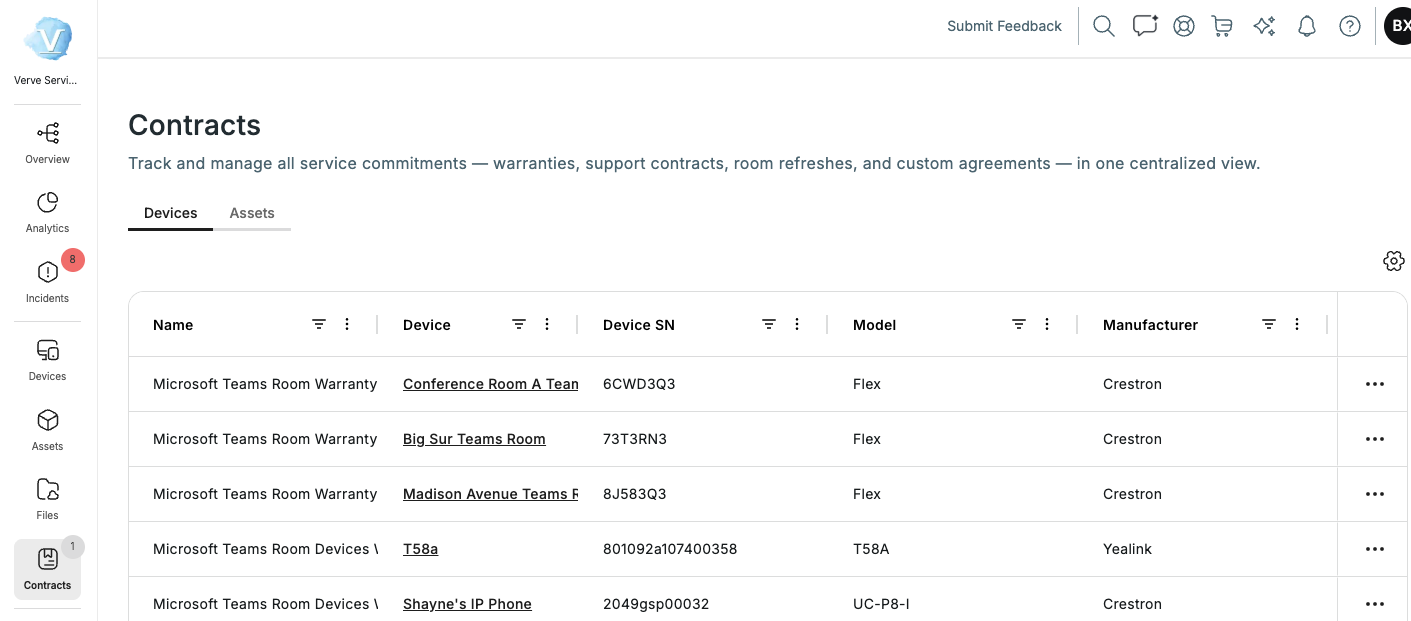
The settings cog in the top-right corner of the Contracts screen lets you customize the columns displayed. Make sure the columns that you want to be visible are checked in the Customize Columns list. Be aware when doing this, however, that your selection will be visible to all users.
Deleting a contract
Hover over an item in the list to reveal the ellipsis (...) on the right. Click the ellipsis to edit, view, or delete the contract.
Uploading a new contract
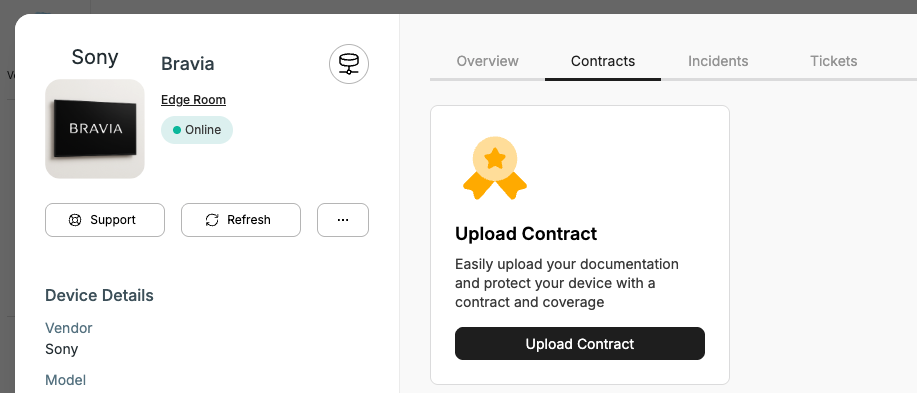
A contract must be attached to a device. As such, to upload a new contract, you must first select a device and then go to the device's Contracts tab.
- Navigate to Devices in the left-hand menu.
- Click the device for which you want to add the warranty, and select the Contracts tab.
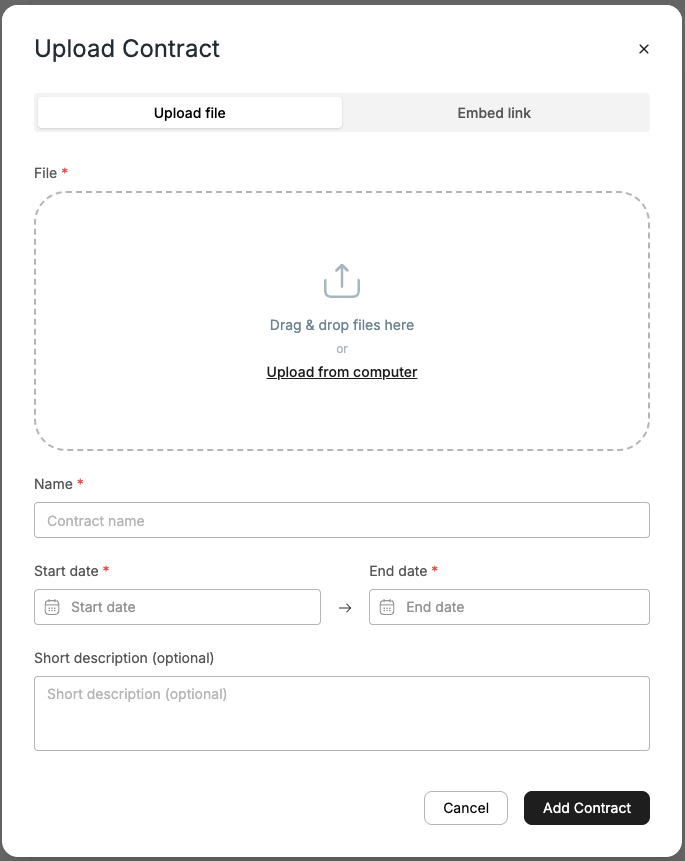
- Click the Upload Contract button, and drag and drop the file or browse to the file’s location and select it to upload it.
- Fill in the remaining fields on the form. Only the Short description field is optional. When you add a contract, it automatically populates the Name field with the name of the uploaded file. You can edit this as you like; spaces are accepted in the Name field.
- Click Add Contract to finish the process.
The contract will be displayed on the Contracts tab for the device, with an indication of how much time is remaining before it expires.
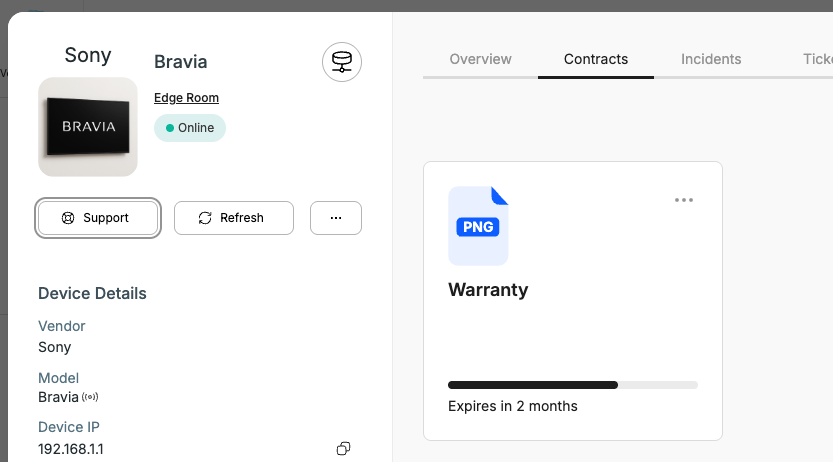
The new contract will also be visible on the Contracts screen. You can provide more details about it by editing the contract information, as described in the following section.
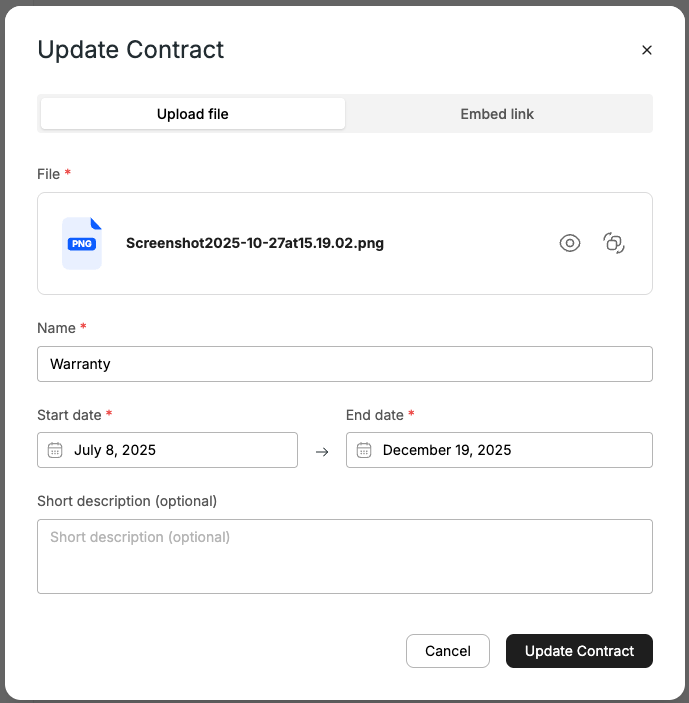
Editing a contract
To edit the information about a contract, follow these steps:
- Use one of the following methods to access the Update Contract screen:
- Navigate to Contracts in the left-hand menu, hover over the contract you want to edit, click the ellipsis, and select Edit.
- Click the device that has the contract and select the Contracts tab. Hover over the contract you want to edit, click the ellipsis, and select Edit.
- Make the desired changes on the Update Contract screen and click Update Contract.
Updated 9 months ago