Service Now (Beta)
Step 1: Open the integration
- Select Integrations in the left sidebar.
- Click on ServiceNow (Beta).
- Click Connect.
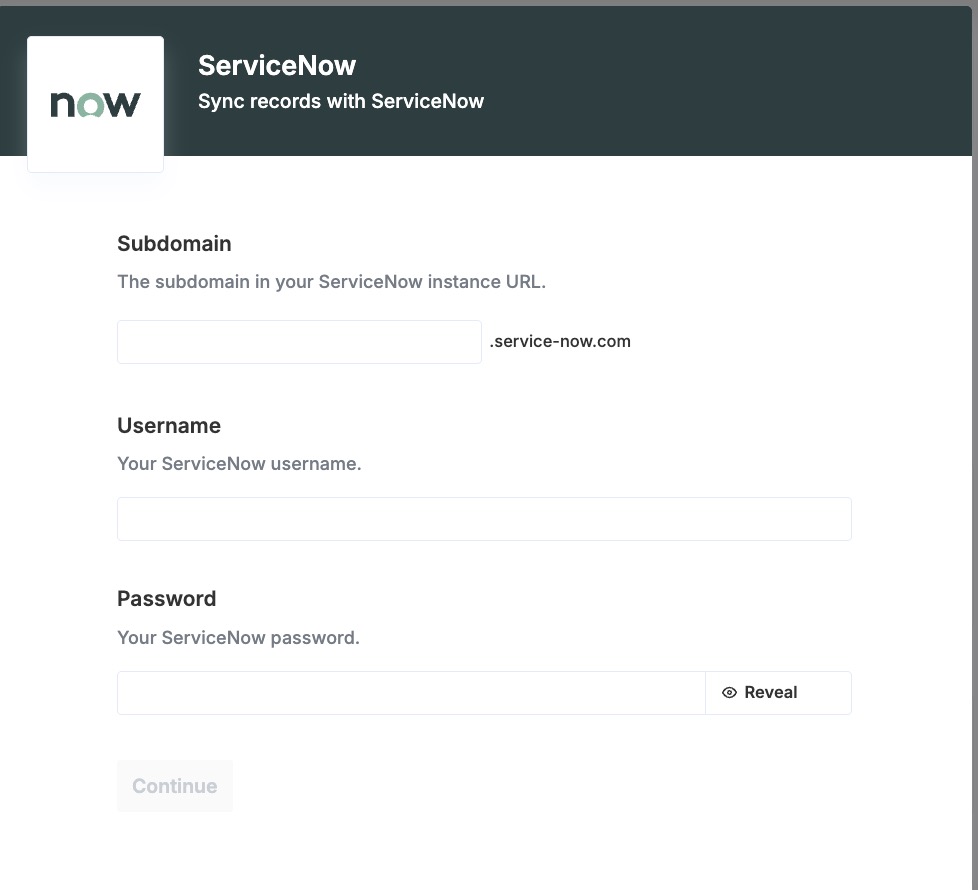
Step 2: Enter your credentials
- Set up your credentials and subdomain.
Enter the subdomain only — no need to includehttps://
- Configure the relevant fields (Not all are mandatory)
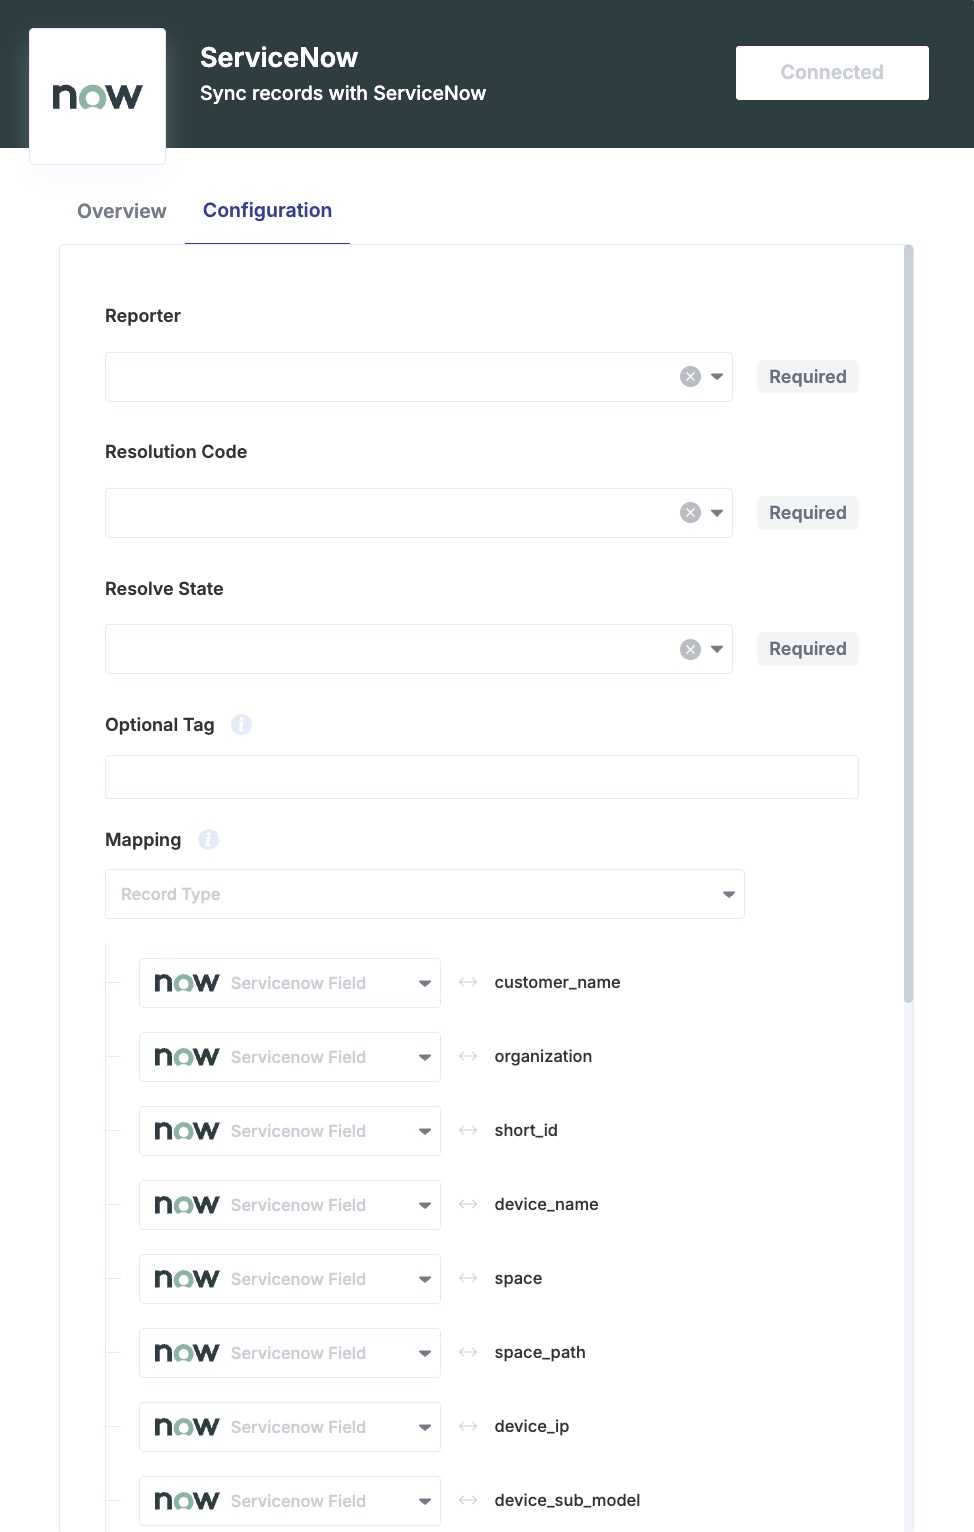
Step 3: Configure fields
Configure the relevant fields. Not all fields are mandatory.
- Values must be set manually.
- Reporter is equivalent to the Caller field in ServiceNow.
Step 4: Verify the integration
Once the integration is active, create a test incident or wait for an offline device — a corresponding ticket should appear in your ServiceNow instance.
Troubleshooting
If the ServiceNow integration is not working, check the following:
- Confirm your subdomain is correct (no
https://). - Verify your credentials have the required permissions in ServiceNow.
- Ensure the integration is enabled in Xyte.
ServiceNow Integration Setup
Part 1 — ServiceNow setup
Step 1 — Create a custom role
In ServiceNow, create a custom role named xyte_incident_reporter:
- Go to User Administration → Roles
- Click New
- Enter
xyte_incident_reporteras the role name - Click Submit
Step 2 — Add ACL rules for field mapping
Xyte needs read access to the ServiceNow schema so fields can be mapped correctly during setup.
Go to System Security → Access Control (ACL) and create the following two ACL rules:
ACL rule 1
| Field | Value |
|---|---|
| Type | Record |
| Operation | Read |
| Name | sys_dictionary |
| Field | -- None -- |
| Roles | xyte_incident_reporter |
Click Submit.
ACL rule 2
| Field | Value |
|---|---|
| Type | Record |
| Operation | Read |
| Name | sys_dictionary |
| Field | * |
| Roles | xyte_incident_reporter |
Click Submit.
Step 3 — Add an ACL rule to allow tagging
Xyte needs permission to write to the ServiceNow label entry table so it can apply tags where needed.
Go to System Security → Access Control (ACL) and create the following ACL rule:
| Field | Value |
|---|---|
| Type | Record |
| Operation | Write |
| Name | Label Entry |
| Field | Table Key |
| Roles | xyte_incident_reporter |
Click Submit.
Step 4 — Create the integration user
Create a dedicated ServiceNow user for the Xyte integration.
- Go to User Administration → Users and click New
- Fill in the following values:
| Field | Value |
|---|---|
| Name | xyte_api |
| Internal integration user | Checked |
| Roles | rest_service, itil, personalize_choices, xyte_incident_reporter |
- Click Submit
Part 2 — Xyte setup
In Xyte, configure the ServiceNow integration using the following details:
| Field | Value |
|---|---|
| Subdomain | Your ServiceNow instance prefix (see note below) |
| Username | xyte_api |
| Password | The password created for the xyte_api ServiceNow user |
Subdomain: This is the prefix of your ServiceNow URL. For example, if your ServiceNow URL is
https://acme.service-now.com, the subdomain isacme
Optional - Setting up a test instance
If you want to test the integration using the Xyte Playground, you can create a free ServiceNow developer instance.
- Go to https://signon.service-now.com/sso and choose Developer Portal.

- Go to Manage my instance and create an instance if you haven't already.

- Click on the instance URL to open ServiceNow Studio.

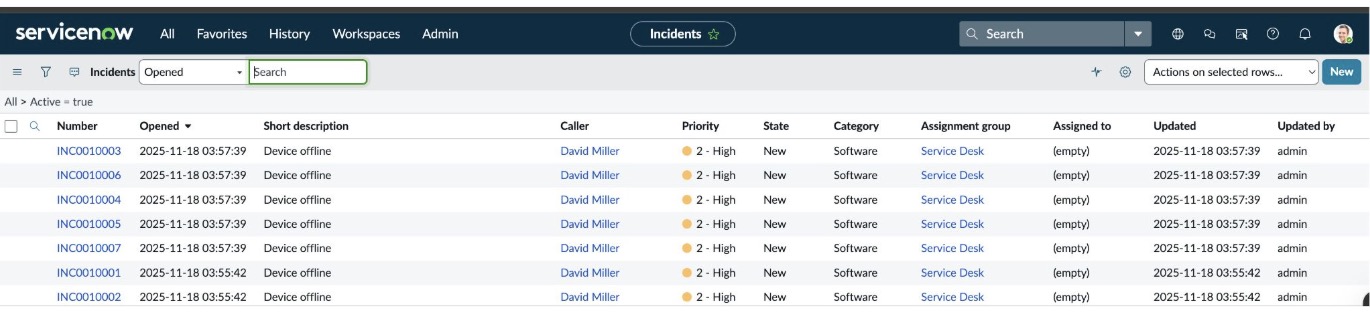
- In the top left, go to All → Service Desk → Incidents.
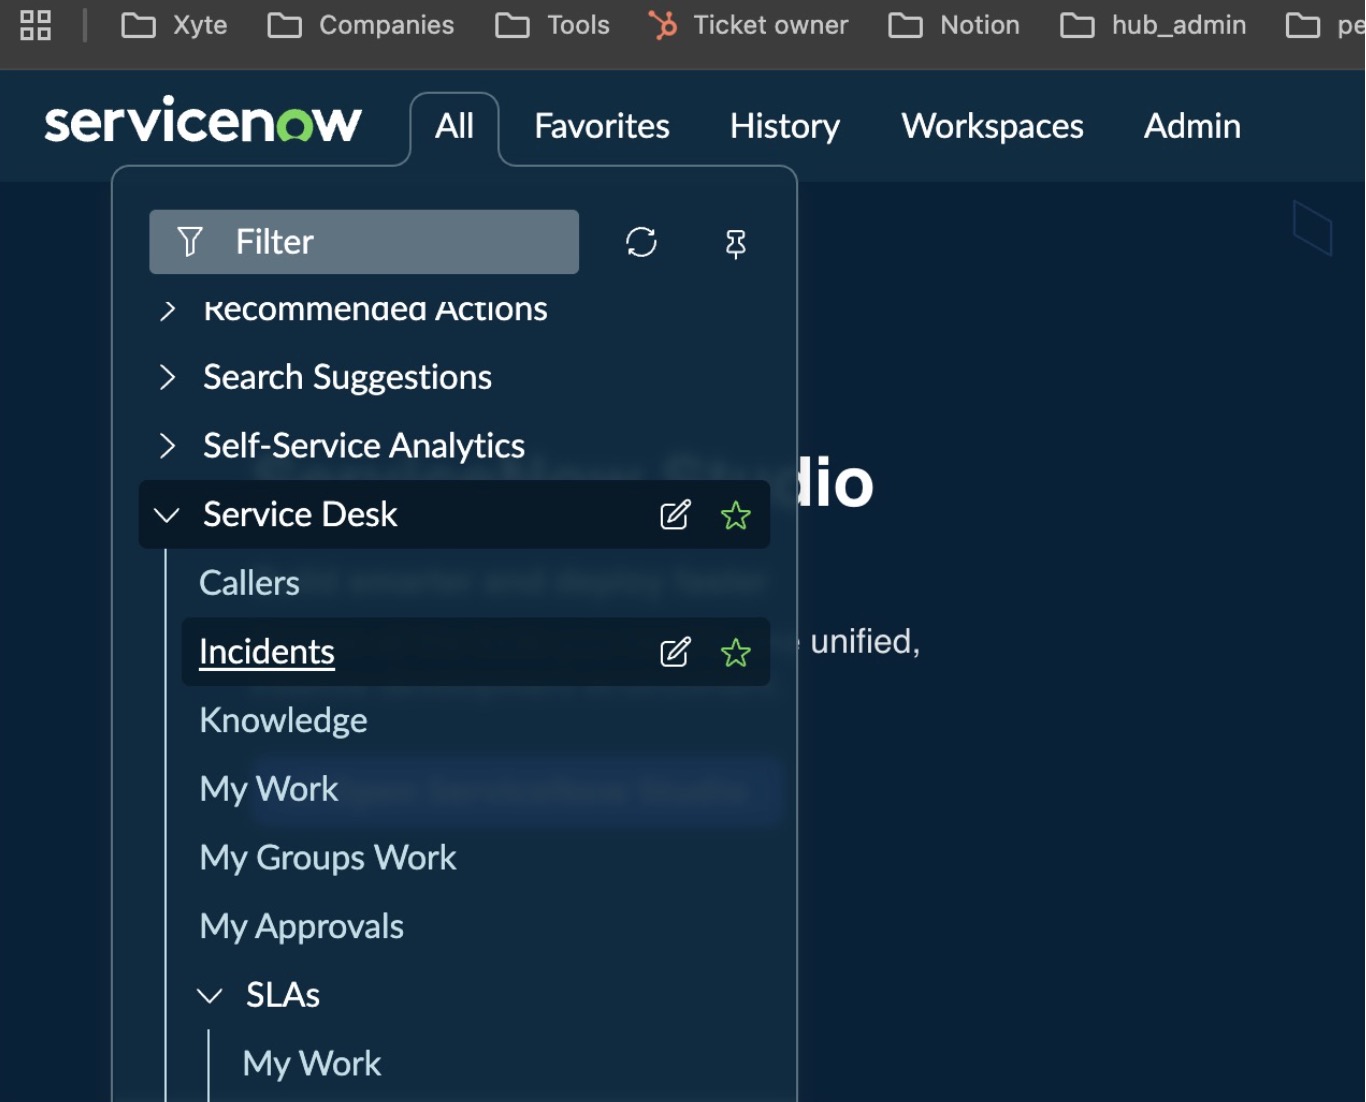
- Open All → Service Desk → Incidents to view and manage incidents.