Jira Outbound Webhook
## Overview
A Jira outbound webhook sends data from Jira to an external endpoint when a specific event occurs — for example, notifying an external system when a Jira work item is created, updated, or transitioned. This is done using Jira's Global Automation with a Send web request action.
How it works
You create a Jira automation rule that:
- Listens for a Jira event (trigger)
- Optionally checks a condition (e.g. only fire for items related to a specific team or description)
- Sends an HTTP POST to your external webhook URL
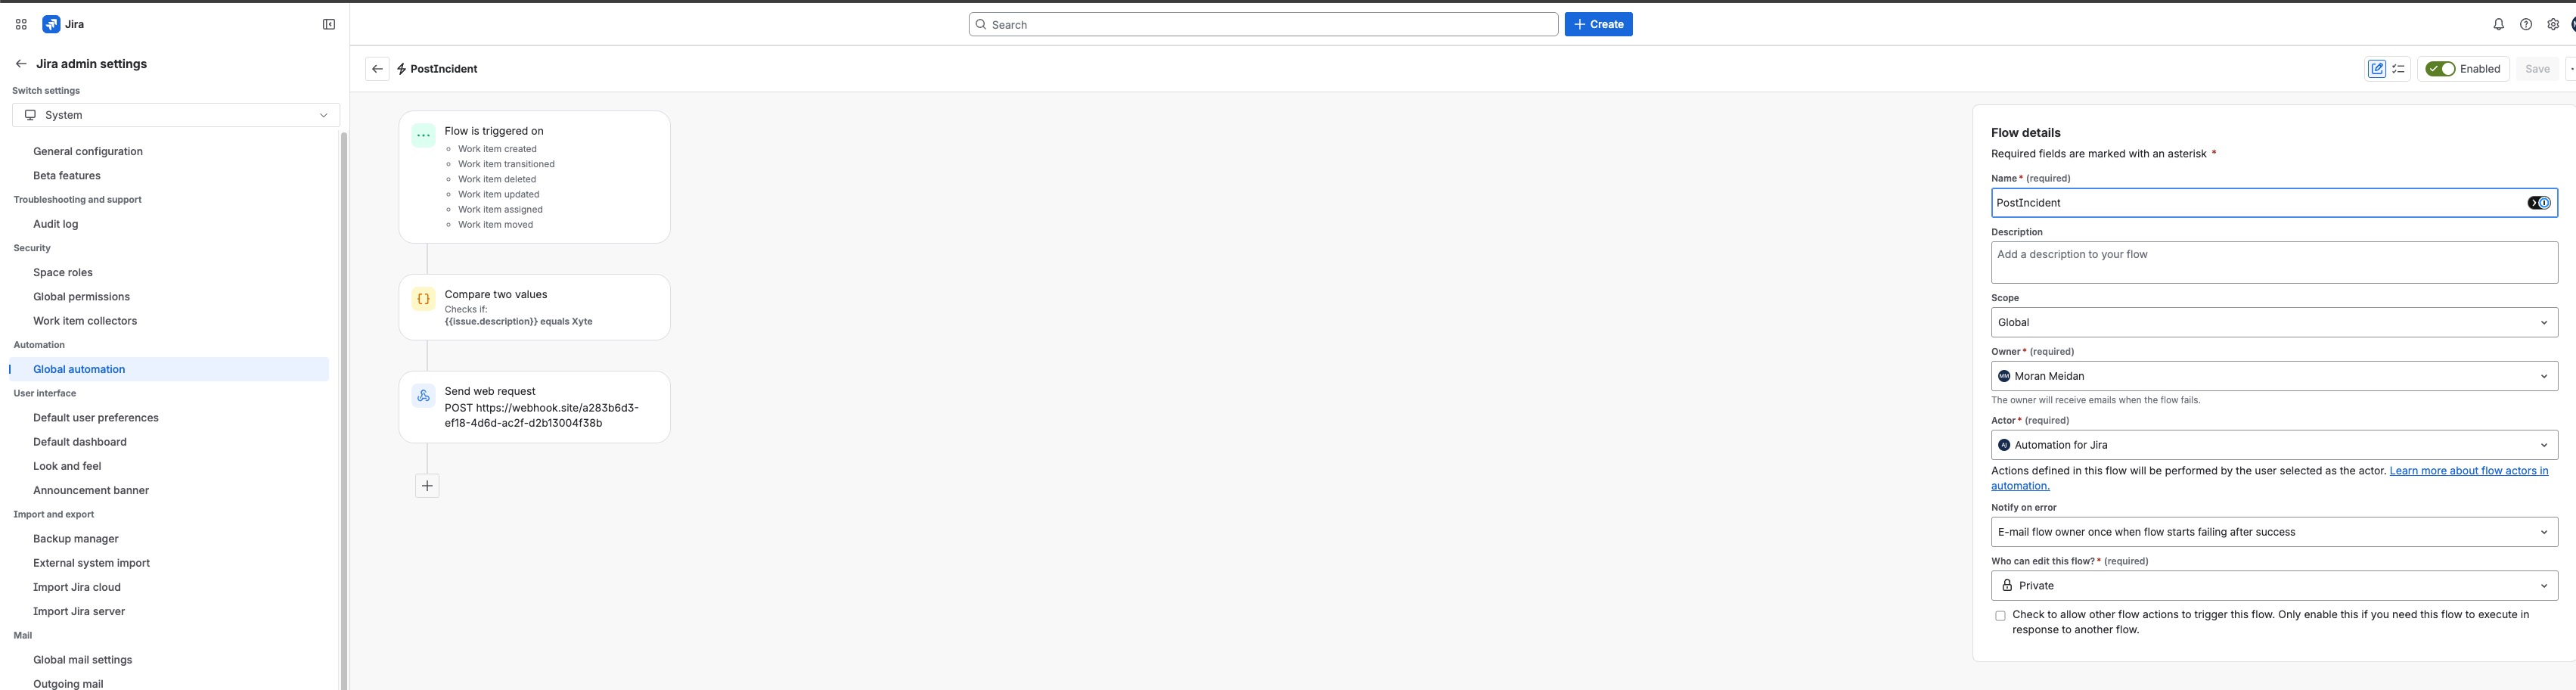
Step 1 — Open Global Automation
- In Jira, click the Settings gear icon (top right)
- Go to Jira admin settings → Automation → Global automation
- Click Create rule
Step 2 — Configure the trigger
Select one or more events that should fire the webhook. Common options:
| Trigger | When it fires |
|---|---|
| Work item created | A new Jira issue is created |
| Work item transitioned | An issue moves to a new status |
| Work item updated | Any field on an issue is changed |
| Work item deleted | An issue is deleted |
| Work item assigned | An issue is assigned to a user |
| Work item moved | An issue is moved to another project |
You can also use Multiple work item events to combine several triggers into one rule.
Step 3 — Add a condition (optional)
Use a condition to filter which issues trigger the webhook. For example:
- Compare two values — check if
{{issue.description}}equals a specific value - Issue fields condition — filter by project, issue type, priority, label, etc.
This prevents the webhook from firing for every single Jira event across all projects.
Step 4 — Add the Send web request action
- Click Add action
- Select Send web request
- Configure the action:
| Field | Value |
|---|---|
| Webhook URL | Your external endpoint URL |
| HTTP method | POST |
| Headers | Content-Type: application/json |
| Body | Select Issue data (Automation format) or use a custom JSON body with smart values |
Example custom body using Jira smart values:
{
  "issue_key": "{{issue.key}}",
  "summary": "{{issue.summary}}",
  "status": "{{issue.status.name}}",
  "assignee": "{{issue.assignee.displayName}}",
  "description": "{{issue.description}}"
}
Step 5 — Configure flow details
On the right-hand panel, set:
| Field | Value |
|---|---|
| Name | A descriptive name (e.g. PostIncident) |
| Scope | Global (to apply across all projects) |
| Actor | Automation for Jira |
| Notify on error | Email the flow owner when the flow fails after success |
| Who can edit this flow | Private or your team |
Step 6 — Enable the rule
Click Save and toggle the rule to Enabled (top right).
Troubleshooting
| Issue | What to check |
|---|---|
| Webhook not firing | Confirm the rule is Enabled and the trigger matches the event you expect |
| Condition filtering out everything | Test the condition using the Audit log — open the rule and check which executions were skipped |
| External endpoint not receiving data | Check the Audit log for the Send web request step — it shows the HTTP response code and error details |
| 401 / 403 errors | Make sure the endpoint accepts unauthenticated requests or add an Authorization header in the Send web request action |
| Wrong data in payload | Use Jira's smart value reference to verify the correct field names: {{issue.fieldName}} |
Additional resources
Updated about 2 months ago